
Pulseway PC Monitor
 |
 |
 |
 |
| MONITOR EVERYTHING Real time status, system resources, logged in users, network performance, critical updates, IIS, SQL Server, Exchange, Active Directory, VMware, Hyper-V and SNMP enabled devices - just to name a few. |
BE FIRST TO KNOW
|
BE IN CONTROL
|
ANYWHERE, ANYTIME
|
Latest News
Recent developments and updates
I spent years trying to find the right systems monitoring tool. Most were too expensive or too complex to set up. Several years ago I came across Pulseway and all my problems were solved in an affordable hosted solution. System patching is a breeze with Pulseway. Great product!
Bobby Watt
Systems Administrator / Robert Half Technology
Makes my job 100 times easier. It has cut down critical downtime with our industrial applications by monitoring specific processes and alerting me to them stopping. Most times I'm fixing the problem before it's becomes known on the shop floor. And when things break during the night I'm alerted and fix them remotely before anybody gets to work.
David Koprovic
President / KMF, Inc.
This is one of the best monitoring applications I have come across in my 13 years of network and server administration. They constantly add new features and their support and assistance has always been top notch.
Barry Louzada
Network and Security Administrator / Smartcall
 |
Monitor Everything Windows, Linux and Mac systems as well as .NET and Java applications. Get real time status, system resources, logged in users, network performance, Windows updates, IIS, SQL Server, Exchange, Active Directory, VMware, Hyper-V and SNMP enabled devices - just to name a few.
|
|
Be First To Know Receive instant alerts on critical problems that can lead to system failures. You can also define smart rules to fine tune alert conditions and run specific tasks when triggered. |
 |
 |
Be In Control Fix problems on-the-go by sending commands from any smartphone or tablet. Run commands in terminal, manage running processes and restart services, apply critical updates, restart systems and many, many more. |
|
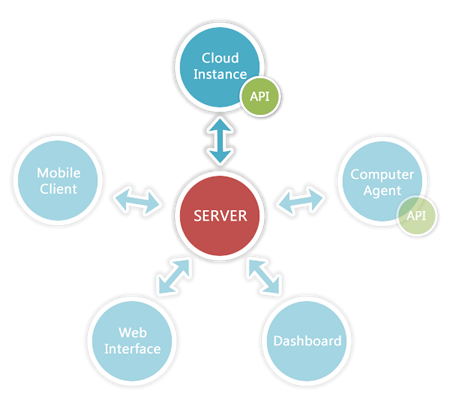
Application Monitoring With the Cloud API you can monitor and control all your Cloud app/service instances. It's easy to integrate, you will need to write just a few lines of code for the cloud instance to appear in your list of monitored systems.
|
 |
 |
Secure Encrypted communication and mobile device authorization ensures that your private infrastructure information stays private and unauthorised access is prevented. |
|
Anywhere, Anytime With mobile apps available for all mobile platforms you have your entire IT infrastructure in your hand at any time from anywhere. Feel free to leave your desk. |
 |
 |
Active Directory Get notified when a user locks out of his account so you can investigate and resolve security issues in no time. You can enable, disable and reset an account password as well as manage user groups. All of these on the go so your users don't wait on you to arrive in the office. |
|
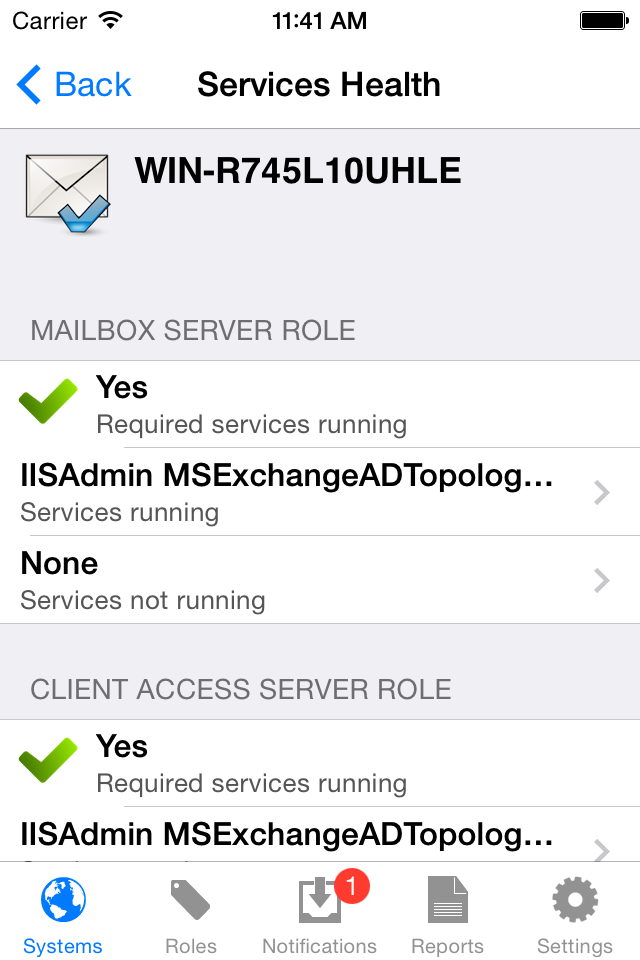
Exchange View mailbox statistics and MAPI connectivity. Manage mailbox protocols and GAL visibility. Check each role services health and manage active queues. All of these from your smartphone.
|
 |
 |
System Center Operations Manager Receive notifications for any alert or warning, check the real-time health status of all the monitored systems, execute tasks and track their output. This server module offers a mobile dashboard for SCOM. |
|
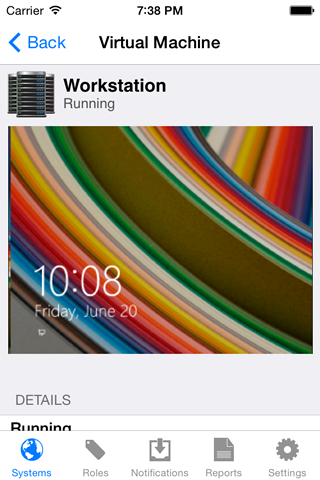
Hyper-V Be in control of your virtual machines. View running status, health state and heartbeat as well as starting, pausing and stopping virtual machines.
|
 |
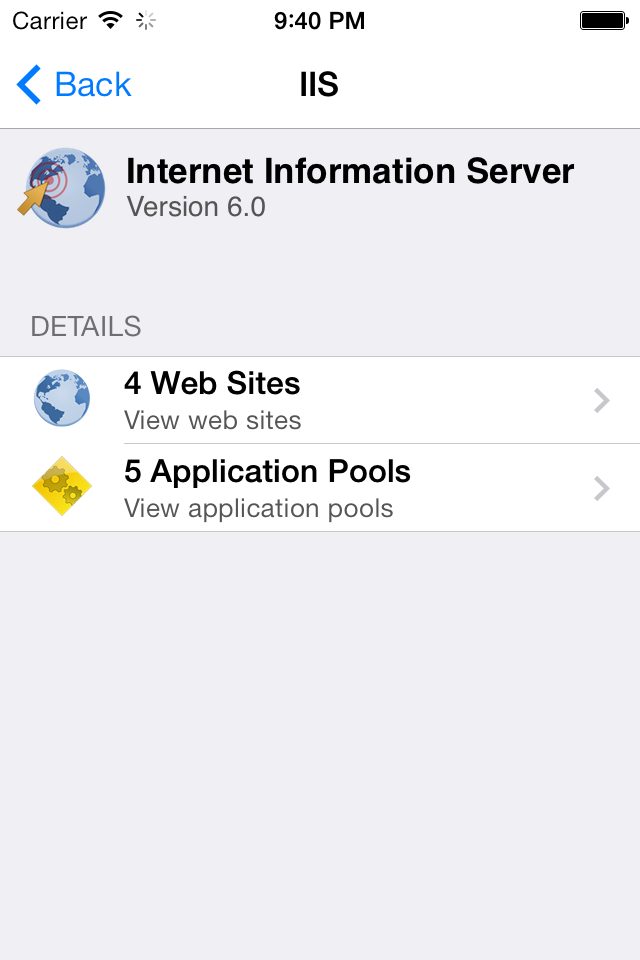 |
Internet Information Services Improve your web sites availability with proactive alerting when a web site or application pool is down. You can also start, stop and restart web sites and recycle application pools. |
|
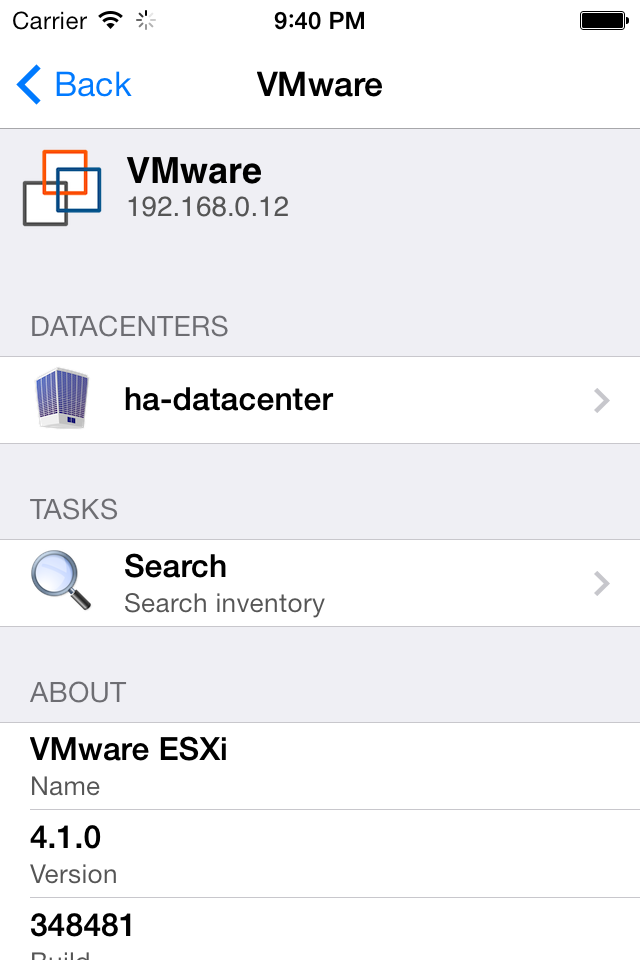
VMware Manage all your virtual machines and hosts in your datacenters. View running status, health state and heartbeat as well as starting, pausing and stopping virtual machines and hosts.
|
 |
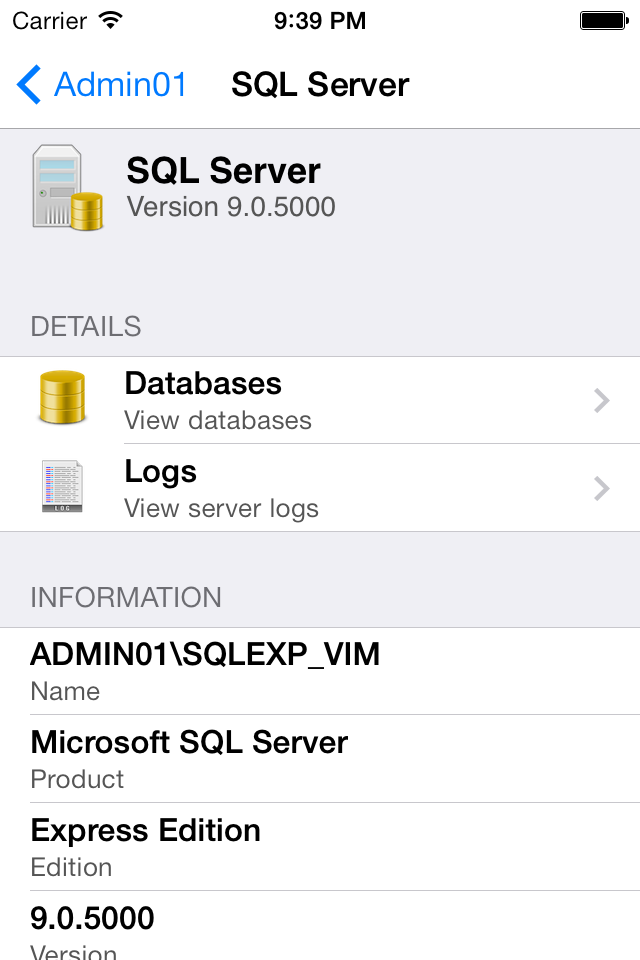 |
SQL Server Monitor databases, browse tables, run SQL queries, start jobs and view logs. All in one simple to use but very powerful module. |
|
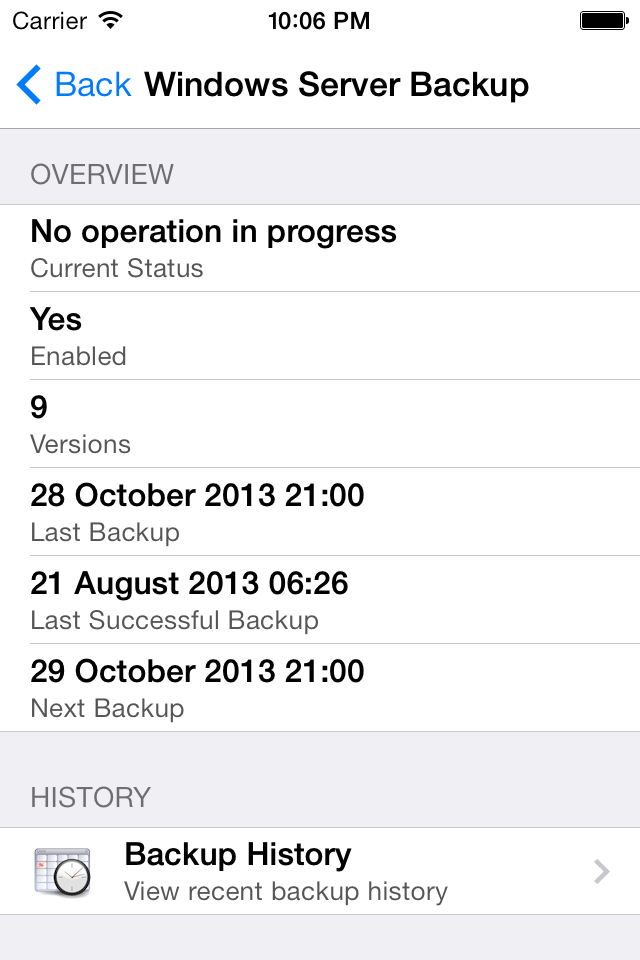
Windows Server Backup Monitor all the backups and receive notifications when a backup operation succeeds or fails.
|
 |
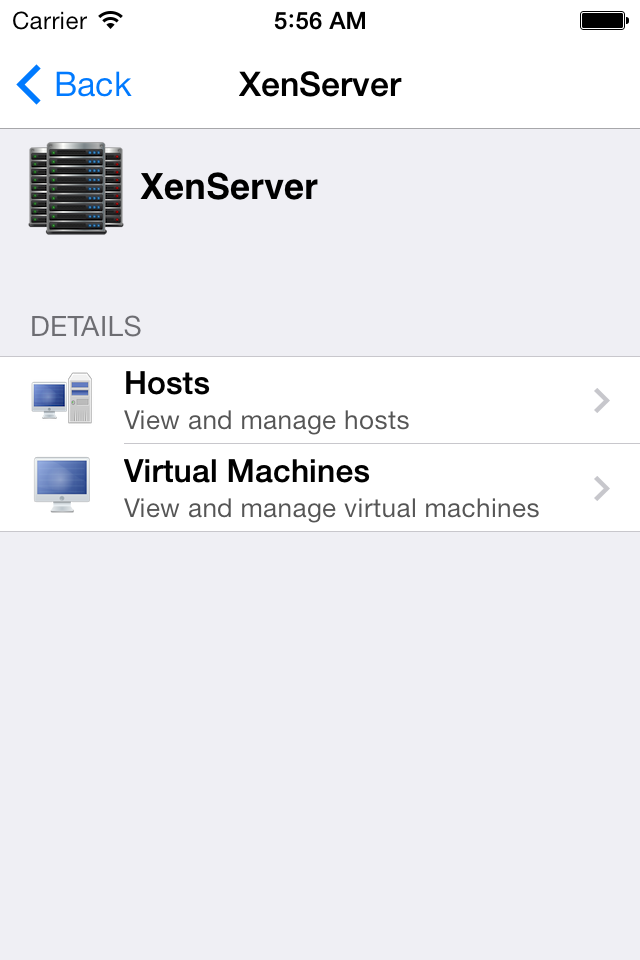 |
XenServer Manage all XenServer virtual machines and hosts. |
|
Configuration Made Easy Use the group deployment and configuration policies to distribute and configure the monitoring software on all your systems. It's that simple. |
 |
 |
No Boundaries Pulseway has the technical know-how and global reach to ensure that your computers and networks function reliably and seamlessly no matter where they are. |

|
HIGHLY SCALABLE
|
SERVER MODULES
|
SECURE
|
||
|
SIMPLE LICENCING MODEL
|
SHARED MONITORING
|
TRACEABILITY
|
||
|
PRIVACY
|
API'S Cloud, Server and Admin API's are available giving you even greater control and flexibility over the Enterprise Server and monitored systems. |
EFFECIENCY
|
|
University of Auckland Business School |
|
|
Beerepoot Automatisering |
|
|
CareTech Solutions |
|
|
Global PC |
|
|
Highland Community College |
REST API
|
With our Cloud API you can monitor and control
|
.NET |
Java |
|
Display additional information in computer details,
execute custom commands and send notifications using our Client API / Plugins. |
Windows |
| Check plugins developed by users from our active community. |
| How it Works Introduction to Cloud API |
.NET Tutorial Learn to use Cloud .NET API |
Java Tutorial Learn to use Cloud Java API |
| How it Works Introduction to Client API |
Windows Tutorial Learn to use Client Windows API |
Linux Tutorial
Learn to use Client Linux API |
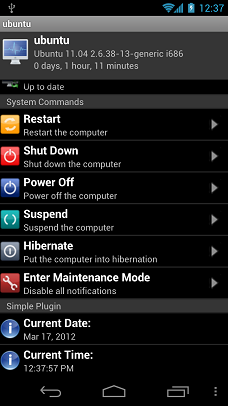
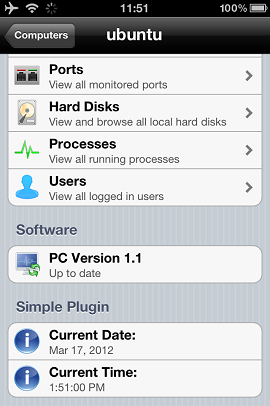
| A Simple Plugin
Create you first plugin |
Installing Plugins
How to add plugin in Manager |
Client API Interface
Simple interface |
Support Additional help resources |
Let’s start by writing a plugin which shows you the current date and time from the plugin host. Launch Visual Studio then create a new C# or VB project using the "Class Library" template with the name "SimplePlugin". See Figure A.
 Figure A
From solution explorer rename "Class1.cs" to "SimplePlugin.cs" and open it. Now we need to add a project reference to our PulsewayClient.dll file which is located in the directory of Pulseway.See Figure B.
 Figure B
Now we can start writing our plugin. Let’s open "SimplePlugin.cs" (if it’s not already opened) and add under the last using statement:
using MM.Monitor.Client;
Also we need to tell Visual Studio that we are implementing Pulseway’s API’s interface by adding “ : ClientPlugin” right after the class definition, like this:
public class SimplePlugin : ClientPlugin
At this moment we start writing the code that will identify our plugin. After the class opening bracket you need to add a new line in order to write code inside the class and add the following code that will be used by Pulseway Manager to show it’s user the name and description of the plugin.
public override string GetPluginName() { return "Simple Plugin"; } public override string GetPluginDescription() { return "This plugin shows the current date and time."; }
The text between the brackets can be changed to match your plugin name and description. Now only one thing remains to be implemented, the part where we tell our Mobile Pulseway what to show to clients. We do this by adding the following code under the other two (Order doesn’t matter).
public override Groups GetAdditionalComputerDetails() { Groups container = new Groups(); Group mainGroup = new Group("Simple Plugin"); SimpleItem date = new SimpleItem("Current Date: ", System.DateTime.Now.Date.ToShortDateString()); SimpleItem time = new SimpleItem("Current Time: ", System.DateTime.Now.TimeOfDay.ToString()); NumberInputItem numericInput = new NumberInputItem("numeric", "Invocation Count", invocationCount.ToString()); mainGroup.Items.Add(date); mainGroup.Items.Add(time); mainGroup.Items.Add(numericInput); container.Add(mainGroup); return container; }
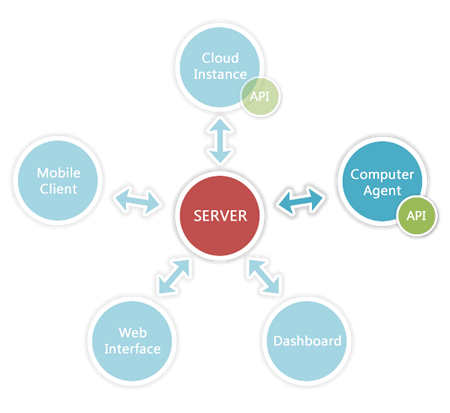
Don’t worry, it’s actually not as complicated as it seems. As you can see from the method (function) declaration we have to return a Groups type back to Mobile PC Monitor which is actually a container of containers. A "Groups" type can have many "Group" containers which can have many "SimpleItem" / "CommandItem" / "PageItem". See Figure C.
 Figure C
using System; using MM.Monitor.Client; namespace SimplePlugin { public class SimplePlugin : ClientPlugin { ///<summary> /// Defines the plugin name. ///</summary> ///<returns>Plugin name</returns> public override string GetPluginName() { return "Simple Plugin"; } /// <summary> /// A short description which will be displayed when the plugin is installed. /// </summary> /// <returns>Plugin description</returns> public override string GetPluginDescription() { return "This plugin shows the current date and time."; } /// <summary> /// Occurs whenever a Pulseway loads the computer details page. /// </summary> /// <returns>A group of items which contain the current date and time.</returns> public override Groups GetAdditionalComputerDetails() { Groups container = new Groups(); // Group of "Group" types. Group mainGroup = new Group("Simple Plugin"); // Group of "SimpleItem" / "CommandItem" / "PageItem" with the title Simple Plugin. SimpleItem date = new SimpleItem("Current Date: ", System.DateTime.Now.Date.ToShortDateString()); // Simple Item with "Current Date: " title and current date as subtitle. SimpleItem time = new SimpleItem("Current Time: ", System.DateTime.Now.TimeOfDay.ToString()); // Simple Item with "Current Time: " title and current time as subtitle. NumberInputItem numericInput = new NumberInputItem("numeric", "Invocation Count", invocationCount.ToString()); mainGroup.Items.Add(date); // Adding the date SimpleItem to our Group container. mainGroup.Items.Add(time); // Adding the time SimpleItem to our Group container. mainGroup.Items.Add(numericInput); // Adding the NumericInputItem to our Group container. container.Add(mainGroup); // Adding the mainGroup Group to Groups container. return container; // Returning our Groups container to Pulseway. } private int invocationCount = 1; // An integer variable that will be used with our numeric input public override void NumericInputValueChanged(string inputId, int inputValue) // Occurs whenever you submit a new value from the mobile client. { invocationCount = inputValue; } } }
All the text after double ("//") or triple slashes ("///") is completely optional and its reason is for code comments. Now go ahead and press the "F6" button on your keyboard and Visual Studio will build your plugin into a dll file. Now browse to your project’s folder, go inside the "bin" folder, then inside "Debug" you will find "SimplePlugin.dll". This file represents the plugin you just made and you need to install it into Pulseway for it to work.
| A Simple Plugin
Create you first plugin |
Installing Plugins
How to add plugin in Manager |
Client API Interface
Simple interface |
Support Additional help resources |
In order to install a plugin you need to have Pulseway installed and a Pulseway account (you can create a free one from Pulseway Manager application).
Steps to install a plugin:
- Open Pulseway Manager from a desktop shortcut or from Start Menu (its label is just Pulseway).
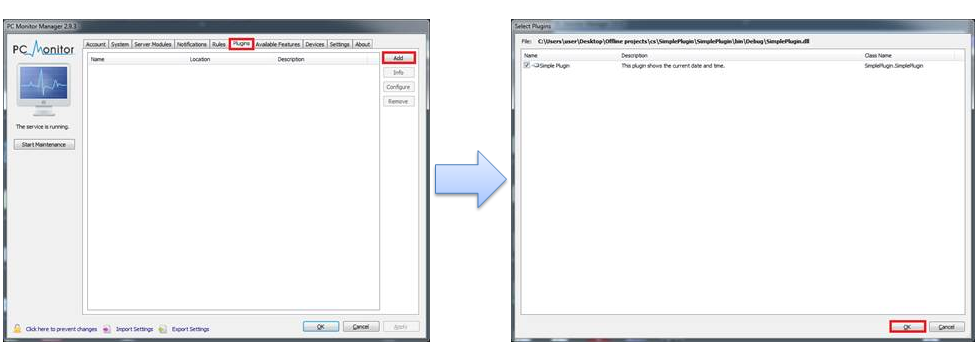
- Browse to "Plugins" tab. See Figure D.
- Click "Add" and browse to your plugin’s directory and double click the dll file (The one that matches the plugin’s name not PulsewayClient.dll). See Figure D.
- Make sure that all available class names are checked and press "Ok". See Figure F.
- Save your changes by pressing "Apply" then "Ok".
| A Simple Plugin
Create you first plugin |
Installing Plugins
How to add plugin in Manager |
Client API Interface
Simple interface |
Support Additional help resources |
string GetPluginName()
This method gets called whenever Pulseway requires the plugin name for logging, displaying it to the user in the plugins tab and saving settings.
public override string GetPluginName() { return "Simple Plugin"; }
string GetPluginDescription()
GetPluginDescription’s main purpose is pretty straight forward; it shows to the user a short descriptive text that represents the main functionality of your plugin.
public override string GetPluginDescription() { return "This plugin shows the current date and time."; }
Groups GetAdditionalComputerDetails()
In order for Pulseway to actually show anything new to its clients this method gets used. The Groups that get returned will be shown in the computer details page. This is the perfect place to show a plugin main menu with "PageItem" and "CommandItem" that will further be used to lead the user to the data he is looking for.
public override Groups GetAdditionalComputerDetails() { Groups container = new Groups(); // Group of "Group" types. Group mainGroup = new Group("Simple Plugin"); // Group of "SimpleItem" / "CommandItem" / "PageItem" with the title Simple Plugin. SimpleItem date = new SimpleItem("Current Date: ", DateTime.Now.Date.ToShortDateString()); // Simple Item with "Current Date: " title and current date as subtitle. SimpleItem time = new SimpleItem("Current Time: ", DateTime.Now.TimeOfDay.ToString()); // Simple Item with "Current Time: " title and current time as subtitle. mainGroup.Items.Add(date); // Adding the date SimpleItem to our Group container. mainGroup.Items.Add(time); // Adding the time SimpleItem to our Group container. container.Add(mainGroup); // Adding the mainGroup Group to Groups container. return container; // Returning our Groups container to Pulseway. }
void CommandReceived(int commandId)
Here is where the action begins. The command got executed and we received the identification number of which command was called.
private const int COMMAND_INCREASE_INVOCATION_COUNT = 1; private int invocationCount; public override void CommandReceived(int commandId) { if (commandId == COMMAND_INCREASE_INVOCATION_COUNT) invocationCount++; }
void PluginLoaded()
This method gets triggered when the plugin is fully loaded and ready to start working.
public override void PluginLoaded() { invocationCount = 0; }
void SetValueForKey(string Key, string Value)
In order to save plugin’s data we can implement our own methods or use "SetValueForKey" which creates a registry entry with the name specified in the "Key" parameter and our value safely encrypted.
public override void PluginLoaded() { SetValueForKey("Plugin Configuration", "This plugin shows the current date and time."); }
string GetValueForKey()
GetValueForKey is used to get a previously stored value using "SetValueForKey". This takes the value from the Windows Registry, decrypts it and returns your value in clear text.
public override string GetPluginDescription() { return GetValueForKey("PluginDescription"); }
Version GetMinimumRequiredAgentVersion()
When your plugin uses a pre-release version of Pulseway and you want to release it, you should specify which is the minimum required version to make sure that everything will work smoothly.
public override MM.Monitor.Client.Version GetMinimumRequiredAgentVersion() { return new MM.Monitor.Client.Version(2, 9, 1); }
Form GetConfigurationForm()
If your plugin requires a configuration in order to work then the best approach is having a dialog (a Form in our case) which can handle the plugin configuration. This Form gets created when the user clicks the "Configure" button inside the "Plugins" tab from Pulseway Manager.
public override System.Windows.Forms.Form GetConfigurationForm() { return new MyConfigurationForm(this) as System.Windows.Forms.Form; }
And the form code:
using System.Windows.Forms; using MM.Monitor.Client; namespace SimplePlugin { public partial class MyConfigurationForm : Form { private readonly IDataStore dataStore; public MyConfigurationForm(IDataStore dataStore) { InitializeComponent(); this.dataStore = dataStore; } } }
void PluginDataCheck()
This is where your plugin checks whether it needs to inform you about something, perfect place for notifications to be sent. It gets called automatically every 15-20 seconds.
public override void PluginDataCheck() { invocationCount++; }
void SendNotificationToAllDevices(string message, NotificationPriority priority)
Method used to send a notification to all devices that have push notifications enabled. The message can have up to 250 characters to display on the mobile device alert and up to 5000 characters to be viewed inside the Pulseway client.
public override void PluginDataCheck() { SendNotificationToAllDevices("Current Invocation Count: " + invocationCount, NotificationPriority.NORMAL); }
bool CanSendNotifications
CanSendNotifications is a Boolean field that lets you know if you can send a notification (If false it means that there is a notification sent by this plugin that wasn’t deleted from the client application.
public override void PluginDataCheck() { if (CanSendNotifications) SendNotificationToAllDevices("Current Invocation Count: " + invocationCount, NotificationPriority.NORMAL); }
void NotificationDeleted()
If your plugin has to send a notification and you CanSendNotifications returns false then you need to use a Queue (Or any other collection) to store unsent notifications and when we get the signal that we can send a new notification to send the next one on our list.
private readonly Queue notificationList = new Queue(); public override void PluginDataCheck() { string Message = "Current Invocation Count: " + invocationCount; if (CanSendNotifications) SendNotificationToAllDevices(Message, NotificationPriority.NORMAL); else notificationList.Enqueue(Message); } public override void NotificationDeleted() { SendNotificationToAllDevices(notificationList.Dequeue().ToString(), NotificationPriority.NORMAL); }
ComputerInfo GetComputerInfo()
Sometimes having more information about local computer is crucial so Pulseway API makes sure you have all the data you need to know in real time. ComputerInfo type stores 3 things:
- bool InMaintenanceMode: If true than Maintenance Mode is enabled (that means that all notifications will not be sent).
- string Name: The name of the computer that was set in Pulseway Manager.
- string Group: The group of the computer that was set in Pulseway Manager.
public override void PluginDataCheck() { ComputerInfo localComputer = GetComputerInfo(); if (CanSendNotifications && !localComputer.InMaintenanceMode) SendNotificationToAllDevices(String.Format("Current Invocation Count: {0}\nSent from: {1}\nIn Group:{2}", invocationCount, localComputer.Name, localComputer.Group), NotificationPriority.NORMAL); }
void PluginUnloaded()
This is used called right after the plugin is marked for removal and gives you a chance to disconnect active connections or perform cleanup procedures.
public override void PluginUnloaded() { MyDatabaseConnection.Close(); MyDatabaseConnection.Dispose(); }
Groups GetPageDetails(int pageId)
Occurs when a PageItem gets called by a client and asks for its Groups content.
private const int PAGE_COMPUTER_DETAILS = 1; private const int PAGE_COMMAND_RESET_INVOCATION_COUNT = 1; public override Groups GetPageDetails(int pageId) { if (pageId != PAGE_COMPUTER_DETAILS) return null; Groups container = new Groups(); ComputerInfo localComputer = GetComputerInfo(); Group mainGroup = new Group("Computer Details"); SimpleItem name = new SimpleItem("Computer Name: ", localComputer.Name); SimpleItem group = new SimpleItem("Computer Group: ", localComputer.Group); SimpleItem maintenance = new SimpleItem("Computer Maintenance: ", localComputer.InMaintenanceMode.ToString()); CommandItem command = new CommandItem(PAGE_COMMAND_RESET_INVOCATION_COUNT, "Reset Invocation Count"); mainGroup.Items.Add(name); mainGroup.Items.Add(group); mainGroup.Items.Add(maintenance); container.Add(mainGroup); return container; }
void PageCommandReceived()
PageCommandReceived is not the same thing with CommandReceived. All CommandItems that are triggered from inside a PageItem will trigger PageCommandReceived and all CommandItems that are called from the GetAdditionalComputerDetails will trigger CommandReceived.
public override void PageCommandReceived(int pageId, int commandId) { if (pageId != PAGE_COMPUTER_DETAILS && commandId != PAGE_COMMAND_RESET_INVOCATION_COUNT) return; invocationCount = 0; }
void Trace(string logMessage)
Method used for debugging purposes. If "Diagnostic Logging" is enabled from Pulseway Manager ("Settings" tab -> "Diagnostics" subtab) the logMessage text will be written to a log file located at Pulseway's installation path with the name "trace.txt".
public override void PageCommandReceived(int pageId, int commandId) { if (pageId != PAGE_COMPUTER_DETAILS && commandId != PAGE_COMMAND_RESET_INVOCATION_COUNT) { Trace(String.Format("PageCommandReceived has unknown ids: {0} - {1}", pageId, commandId)); return; } invocationCount = 0; }
void DateInputValueChanged(string inputId, Date inputValue)
Method that will be called whenever an DateInput's value has changed. The Date type contains the year, month and day sent from the mobile client.
public override void DateInputValueChanged(string inputId, Date inputValue) { Console.WriteLine(inputValue.Year + " " + inputValue.Month + " " + inputValue.Day); }
void TimeInputValueChanged(string inputId, Time inputValue)
Method that will be called whenever an TimeInput's value has changed. The Time type contains the hour and minute sent from the mobile client.
public override void TimeInputValueChanged(string inputId, Time inputValue) { Console.WriteLine(inputValue.Hour + ":" + inputValue.Minute); }
void DateTimeInputValueChanged(string inputId, MM.Monitor.Client.DateTime inputValue)
Method that will be called whenever an DateTimeInput's value has changed. The DateTime type contains the year, month, day, hour and minute sent from the mobile client.
public override void DateTimeInputValueChanged(string inputId, MM.Monitor.Client.DateTime inputValue) { Console.WriteLine(inputValue.Year + ":" + inputValue.Month + " " + inputValue.Day + " " + inputValue.Hour + ":" + inputValue.Minute); }
void NumericInputValueChanged(string inputId, int inputValue)
Method that will be called whenever an NumericInput's value has changed. The inputValue type contains the number sent from the mobile client.
public override void NumericInputValueChanged(string inputId, int inputValue) { Console.WriteLine(inputValue.ToString()); }
void TextInputValueChanged(string inputId, string inputValue)
Method that will be called whenever an TextInput's value has changed. The inputValue type contains the text sent from the mobile client.
public override void TextInputValueChanged(string inputId, string inputValue) { Console.WriteLine(inputValue); }
void PickListInputValueChanged(string inputId, int pickListItemId)
Method that will be called whenever an PickListInput's selected item has changed. The pickListItemId represents the ID of the PickListItem.
public override void PickListInputValueChanged(string inputId, int pickListItemId) { Console.WriteLine(pickListItemId.ToString() + " selected"); }
| A Simple Plugin
Create you first plugin |
Installing Plugins
How to add plugin in Manager |
Client API Interface
Simple interface |
Support Additional help resources |
For API level support please visit our API forum at: Pulseway Community.
You can download the Sample Plugin source files here.
| A Simple Plugin
Create you first plugin |
Installing Plugins
How to add plugin in Manager |
Client API Interface
Simple interface |
Support Additional help resources |
Let’s start by writing a plugin which shows you the current date and time from the plugin host. You can use your favourite IDE, but for this example we will use Eclipse.
Launch Eclipse then create a new Java project with the name "SimplePlugin". See Figure A. Press Next then using Add External JARs ... button add the pulseway-client.jar file located in the plugin directory at the pulseway installation location. See Figure B.
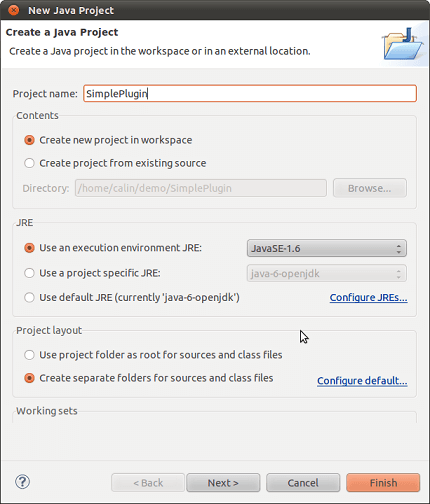 Figure A
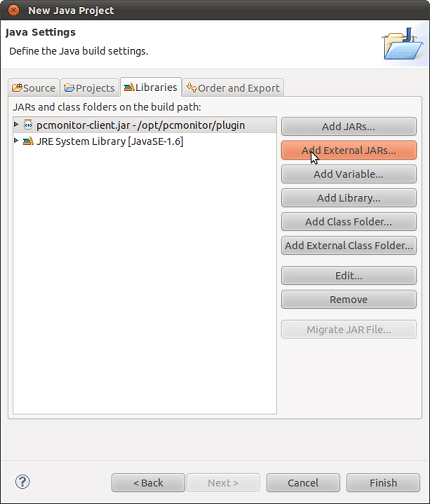 Figure B
Create a new java class named "com.pulseway.demo.SimplePlugin" making sure that you use "com.mmsoftdesign.client.ClientPluginImpl" as Superclass. See Figure C. After clicking finish the class should be opened automatically.
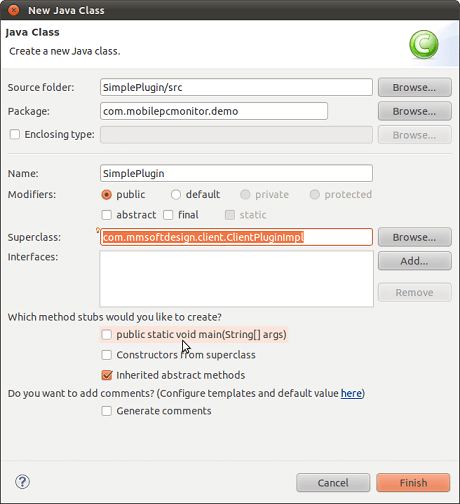 Figure C
Now we can start writing our plugin. Let’s open "SimplePlugin.java" (if it’s not already opened) and add the code that will identify our plugin. Make sure you add code so Pulseway Manager shows it's users the name and description of the plugin.
@Override public String getPluginName() { return "Simple Plugin"; } @Override public String getPluginDescription() { return "This plugin shows the current date and time."; }
The text between the brackets can be changed to match your plugin name and description. Now only one thing remains to be implemented, the part where we tell our Pulseway what to show to clients. We do this by adding the following code under the other two (Order doesn’t matter).
@Override public getAdditionalComputerDetails() { Groups container = new Groups(); Group mainGroup = new Group( "Simple Plugin"); SimpleItem date = new SimpleItem( "Current Date: ", SimpleDateFormat.getDateInstance().format(new Date())); SimpleItem time = new SimpleItem( "Current Time: ", SimpleDateFormat.getTimeInstance().format(new Date())); NumberInputItem number = new NumberInputItem("1", "Change me", Integer.toString(changeMe)); mainGroup.getItems().add(date); mainGroup.getItems().add(time); mainGroup.getItems().add(number); container.add(mainGroup); return container; }
Don’t worry, it’s actually not as complicated as it seems. As you can see from the method (function) declaration we have to return a Groups type back to Mobile PC Monitor which is actually a container of containers. A "Groups" type can have many "Group" containers which can have many "SimpleItem" / "CommandItem" / "PageItem". See Figure D.
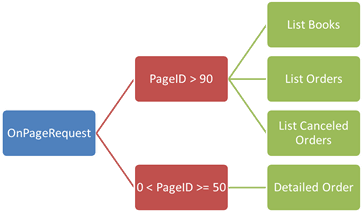 Figure D
package com.pulseway.demo; import java.text.SimpleDateFormat; import java.util.Date; import com.mmsoftdesign.client.ClientPluginImpl; import com.mmsoftdesign.client.model.*; public class SimplePlugin extends ClientPluginImpl { /** *Defines the plugin name. * *@return Plugin name */ @Override public String getPluginName() { return "Simple Plugin"; } /** *A short description which will be displayed when the plugin is installed. * *@return Plugin description */ @Override public String getPluginDescription() { return "This plugin shows the current date and time."; } private int changeMe = 0; /** *Occurs whenever a Pulseway loads the computer details page. * *@return A group of items which contain the current date and time */ @Override public Groups getAdditionalComputerDetails() { Groups container = new Groups();// Group of "Group" types. // Group of "SimpleItem" / "CommandItem" / "PageItem" with the title Simple Plugin. Group mainGroup = new Group( "Simple Plugin"); // Simple Item with "Current Date: " title and current date as subtitle. SimpleItem date = new SimpleItem( "Current Date: ", SimpleDateFormat.getDateInstance().format(new Date())); // Simple Item with "Current Time: " title and current time as subtitle. SimpleItem time = new SimpleItem( "Current Time: ", SimpleDateFormat.getTimeInstance().format(new Date())); NumberInputItem number = new NumberInputItem("1", "Change me", Integer.toString(changeMe)); mainGroup.getItems().add(date); // Adding the date SimpleItem to our Group container. mainGroup.getItems().add(time); // Adding the time SimpleItem to our Group container. mainGroup.getItems().add(number); // Adding the NumberInputItem to our Group container. container.add(mainGroup); // Adding the mainGroup Group to Groups container. return container; // Returning our Groups container to Pulseway. } /** *Occurs whenever a NumericInput's value has been changed. */ @Override public onNumericInputValueChanged(String inputId, int inputValue) { changeMe = inputValue; } }
All the text after double ("//") or between ("/* */") is completely optional and its reason is for code comments. Now go ahead and right click on the project in the package explorer and choose Export ... . In the dialog that opens select JAR file then press Next to go to the JAR File Specifications dialog. Here fill in the desire path and name of the new jar and choose Finish. This file represents the plugin you just made and you need to install it into Pulseway for it to work.
| A Simple Plugin
Create you first plugin |
Installing Plugins
How to add plugin in Manager |
Client API Interface
Simple interface |
Support Additional help resources |
In order to install a plugin you need to have Pulseway installed and a Pulseway account (you can create a free one from Pulseway Manager application).
Steps to install a plugin:
- Open Pulseway Manager by running: sudo ./bin/pulseway-manager from Pulseway install directory.
- Browse to "Plugins" tab. See Figure E.
- Click "Add" and browse to were you've exported the newly created jar and double click the jar file (The one that matches the plugin’s name). See Figure E.
- Make sure that all available class names are checked and press "Ok". See Figure F.
- Save your changes by pressing "Save" then choose to restart Pulseway daemon.
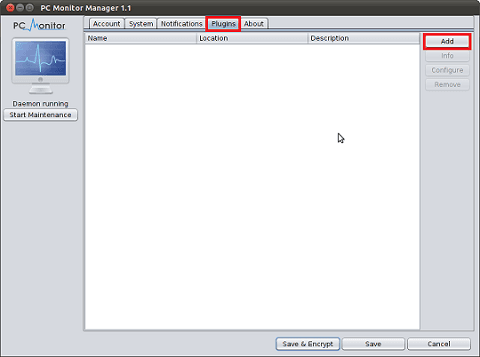 Figure E
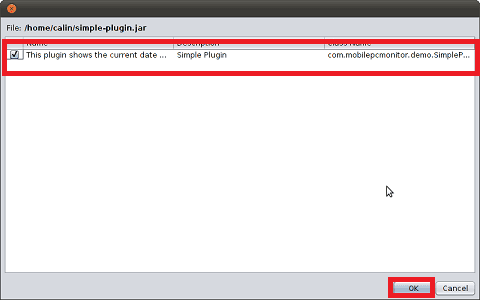 Figure F
| A Simple Plugin
Create you first plugin |
Installing Plugins
How to add plugin in Manager |
Client API Interface
Simple interface |
Support Additional help resources |
String getPluginName()
This method gets called whenever Pulseway requires the plugin name for logging, displaying it to the user in the plugins tab and saving settings.
@Override public String getPluginName() { return "Simple Plugin"; }
String getPluginDescription()
GetPluginDescription’s main purpose is pretty straight forward; it shows to the user a short descriptive text that represents the main functionality of your plugin.
@Override public String getPluginDescription() { return "This plugin shows the current date and time."; }
Groups getAdditionalComputerDetails()
In order for Pulseway to actually show anything new to its clients this method gets used. The Groups that get returned will be shown in the computer details page. This is the perfect place to show a plugin main menu with "PageItem" and "CommandItem" that will further be used to lead the user to the data he is looking for.
@Override public Groups getAdditionalComputerDetails() { Groups container = new Groups();// Group of "Group" types. // Group of "SimpleItem" / "CommandItem" / "PageItem" with the title Simple Plugin. Group mainGroup = new Group( "Simple Plugin"); // Simple Item with "Current Date: " title and current date as subtitle. SimpleItem date = new SimpleItem( "Current Date: ", SimpleDateFormat.getDateInstance().format(new Date())); // Simple Item with "Current Time: " title and current time as subtitle. SimpleItem time = new SimpleItem( "Current Time: ", SimpleDateFormat.getTimeInstance().format(new Date())); mainGroup.getItems().add(date); // Adding the date SimpleItem to our Group container. mainGroup.getItems().add(time); // Adding the time SimpleItem to our Group container. container.add(mainGroup); // Adding the mainGroup Group to Groups container. return container; // Returning our Groups container to Pulseway. }
void onCommandReceived(int commandId)
Here is where the action begins. The command got executed and we received the identification number of which command was called.
private final static int COMMAND_INCREASE_INVOCATION_COUNT = 1; private int invocationCount; @Override public void onCommandReceived(int commandId) { if (commandId == COMMAND_INCREASE_INVOCATION_COUNT) { invocationCount++; } }
void onPluginLoaded()
This method gets triggered when the plugin is fully loaded and ready to start working.
@Override public void onPluginLoaded() { invocationCount = 0; }
void setValueForKey(String key, String value)
In order to save plugin’s data we can implement our own methods or use "setValueForKey" which saves an entry with the name specified in the "key" parameter and our value safely encrypted.
@Override public void onPluginLoaded() { setValueForKey("Plugin Configuration", "This plugin shows the current date and time."); }
String getValueForKey()
getValueForKey is used to get a previously stored value using "setValueForKey". This reads the value, decrypts it and returns it in clear text.
@Override public String getPluginDescription() { return getValueForKey("PluginDescription"); }
Version getMinimumRequiredAgentVersion()
When your plugin uses a pre-release version of Pulseway and you want to release it, you should specify which is the minimum required version to make sure that everything will work smoothly.
@Override public Version getMinimumRequiredAgentVersion() { return new Version(2, 9, 1); }
JDialog getConfigurationForm()
If your plugin requires a configuration in order to work then the best approach is having a dialog (a JDialog in our case) which can handle the plugin configuration. This JDialog gets created when the user clicks the "Configure" button inside the "Plugins" tab from Pulseway Manager.
@Override public JDialog getConfigurationForm() { return new MyConfigurationDialog(this); }
And the form code:
import javax.swing.JDialog; import com.mmsoftdesign.client.IDataStore; public class MyConfigurationDialog extends JDialog { private final IDataStore dataStore; public MyConfigurationDialog(IDataStore dataStore) { this.dataStore = dataStore; initializeComponent(); } }
void onPluginDataCheck()
This is where your plugin checks whether it needs to inform you about something, perfect place for notifications to be sent. It gets called automatically every 15-20 seconds.
@Override public void onPluginDataCheck() { invocationCount++; }
void sendNotificationToAllDevices(String message, NotificationPriority priority)
Method used to send a notification to all devices that have push notifications enabled. The message can have up to 250 characters to display on the mobile device alert and up to 5000 characters to be viewed inside the Pulseway client.
@Override public void onPluginDataCheck() { sendNotificationToAllDevices("Current Invocation Count: " + invocationCount, NotificationPriority.NORMAL); }
boolean canSendNotifications
canSendNotifications is a boolean method that lets you know if you can send a notification (If false it means that there is a notification sent by this plugin that wasn’t deleted from the client application.
@Override public void onPluginDataCheck() { if (canSendNotifications()) { sendNotificationToAllDevices("Current Invocation Count: " + invocationCount, NotificationPriority.NORMAL); } }
void onNotificationDeleted()
If your plugin has to send a notification and you canSendNotifications() returns false then you need to use a Queue (Or any other collection) to store unsent notifications and when we get the signal that we can send a new notification to send the next one on our list.
private final Queue<String> notificationQueue = new LinkedBlockingQueue<String>(); @Override public void onPluginDataCheck() { String message = "Current Invocation Count: " + invocationCount; if (canSendNotifications()) { sendNotificationToAllDevices(message, NotificationPriority.NORMAL); } else { notificationQueue.add(message); } } @Override public void onNotificationDeleted() { sendNotificationToAllDevices(notificationList.poll(), NotificationPriority.NORMAL); }
ComputerInfo GetComputerInfo()
Sometimes having more information about local computer is crucial so Pulseway API makes sure you have all the data you need to know in real time. ComputerInfo type stores 3 things:
- boolean isInMaintenanceMode(): If true than Maintenance Mode is enabled (that means that all notifications will not be sent).
- String getName(): The name of the computer that was set in Pulseway Manager.
- String getGroup(): The group of the computer that was set in Pulseway Manager.
@Override public void onPluginDataCheck() { ComputerInfo localComputer = gGetComputerInfo(); if (canSendNotifications() && !localComputer.isInMaintenanceMode()) { sendNotificationToAllDevices("Current Invocation Count: "+invocationCount+ "\nSent from: "+ localComputer.getName()+ "\nIn Group: "+localComputer.getGroup(),NotificationPriority., NORMAL); } }
void onPluginUnloaded()
This is used called right after the plugin is marked for removal and gives you a chance to disconnect active connections or perform cleanup procedures.
@Override public void onPluginUnloaded() { MyDatabaseConnection.Close(); MyDatabaseConnection.Dispose(); }
Groups getPageDetails(int pageId)
Occurs when a PageItem gets called by a client and asks for its Groups content.
private final static int PAGE_COMPUTER_DETAILS = 1; private final static int PAGE_COMMAND_RESET_INVOCATION_COUNT = 1; @Override public Groups getPageDetails(int pageId) { if (pageId != PAGE_COMPUTER_DETAILS) { return null; } Groups container = new Groups(); ComputerInfo localComputer = getComputerInfo(); Group mainGroup = new Group ("Computer Details"); SimpleItem name = new SimpleItem("Computer Name: ", localComputer.getName()); SimpleItem group = new SimpleItem("Computer Group: ", localComputer.getGroup()); SimpleItem maintenance = new SimpleItem("Computer Maintenance: ", Boolean.toString(localComputer.isInMaintenanceMode())); CommandItem command = new CommandItem(PAGE_COMMAND_RESET_INVOCATION_COUNT, "Reset Invocation Count"); mainGroup.getItems().add(name); mainGroup.getItems().add(group); mainGroup.getItems().add(maintenance); container.add(mainGroup); return container; }
void onPageCommandReceived()
onPageCommandReceived is not the same thing with onCommandReceived. All CommandItems that are triggered from inside a PageItem will trigger onPageCommandReceived and all CommandItems that are called from the getAdditionalComputerDetails will trigger onCommandReceived.
@Override public void onPageCommandReceived(int pageId, int commandId) { if (pageId != PAGE_COMPUTER_DETAILSM && commandId != PAGE_COMMAND_RESET_INVOCATION_COUNT) { return; } invocationCount = 0; }
void trace(String logMessage)
Method used for debugging purposes.When called the logMessage text will be written in the log file.
@Override public void onPageCommandReceived(int pageId, int commandId) { if (pageId != PAGE_COMPUTER_DETAILS && commandId != PAGE_COMMAND_RESET_INVOCATION_COUNT) { trace("PageCommandReceived has unknown ids: "+pageId+" - "+commandId); return; } invocationCount = 0; }
void onDateInputValueChanged(String inputId, Date inputValue)
Method that will be called whenever an DateInput's value has changed. The Date type contains the year, month and day sent from the mobile client.
@Override public void onDateInputValueChanged(String inputId, Date inputValue) { System.out.println("Got date: " + Integer.toString(inputValue.getYear()) + " " + Integer.toString(inputValue.getMonth()) + " " + Integer.toString(inputValue.getDay())); }
void onTimeInputValueChanged(String inputId, Time inputValue)
Method that will be called whenever an TimeInput's value has changed. The Time type contains the hour and minute sent from the mobile client.
@Override public void onTimeInputValueChanged(String inputId, Time inputValue) { System.out.println("Got time: " + Integer.toString(inputValue.getHour()) + " " + Integer.toString(inputValue.getMinutes())); }
void onDateTimeInputValueChanged(String inputId, DateTime inputValue)
Method that will be called whenever an DateTimeInput's value has changed. The DateTime type contains the year, month, day, hour and minute sent from the mobile client.
@Override public void onDateTimeInputValueChanged(String inputId, DateTime inputValue) { System.out.println("Got datetime: " + Integer.toString(inputValue.getYear()) + " " + Integer.toString(inputValue.getMonth()) + " " + Integer.toString(inputValue.getDay()) + " " + Integer.toString(inputValue.getHour()) + " " + Integer.toString(inputValue.getHour())); }
void onNumericInputValueChanged(String inputId, int inputValue)
Method that will be called whenever an NumericInput's value has changed. The inputValue type contains the number sent from the mobile client.
@Override public void onNumericInputValueChanged(String inputId, int inputValue) { changeMe = inputValue; }
void onTextInputValueChanged(String inputId, String inputValue)
Method that will be called whenever an TextInput's value has changed. The inputValue type contains the text sent from the mobile client.
@Override public void onTextInputValueChanged(String inputId, String inputValue) { System.out.println("Got text: " + inputValue); }
void onPickListInputValueChanged(String inputId, int pickListItemId)
Method that will be called whenever an PickListInput's selected item has changed. The pickListItemId represents the ID of the PickListItem.
@Override public void onPickListInputValueChanged(String inputId, int pickListItemId) { System.out.println("Picked Item Id: " + Integer.toString(pickListItemId)); }
| A Simple Plugin
Create you first plugin |
Installing Plugins
How to add plugin in Manager |
Client API Interface
Simple interface |
Support Additional help resources |
For API level support please visit our API forum at: Pulseway Community.
Agents
|
|
|
Fedora 16+, SUSE Linux 11 SP3, openSUSE 11.3+ |
|
Mobile Apps
| |
|
| |
|
Desktop Apps
|
|
API / Plugins
Documentation
|
Check out the user manual for detailed information
|
This guide will help to setup Pulseway for your computers
|
| Get Started This guide will help to setup Pulseway for your computers and mobile devices. |
Pulseway User Manual Check out the user manual for detailed information on how to install and manage or product. |
Pulseway Forum Pulseway community forum keeps you informed and connected with the latest news about our product. |
| Read the Quick Guide | Read the User Manual | Visit Community Forum |
MMSOFT Design was founded in Dublin, Ireland in 2011 and is a specialist provider of remote monitoring and management solutions. Pulseway is the easiest way to remotely monitor and control IT systems from any smartphone or tablet enabling busy IT admins to fix issues on-the-go and be more productive. The solution was launched at the end of 2010 and it has over 275,000 IT users around the world. Pulseway Enterprise Server is used by large enterprises including DELL, Louis Vuitton, Northwestern University, Conde Nast and British Columbia Institute of Technology.
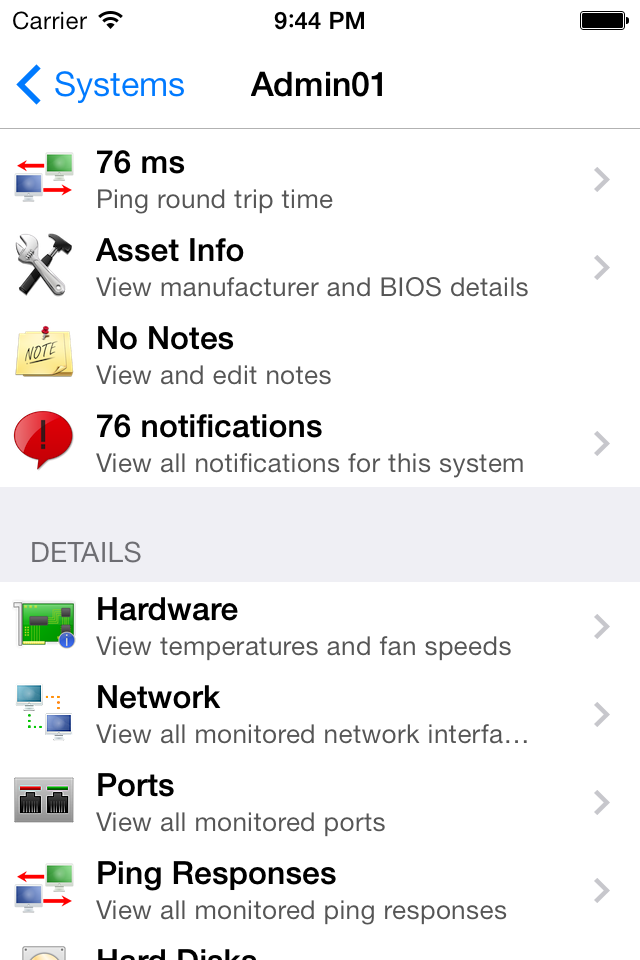
Manage Microsoft Active Directory Domain Services using your smartphone or tablet from anywhere, anytime. Pulseway seamlessly integrates with Active Directory deployment without the need of any configuration or infrastructure changes.
![]()
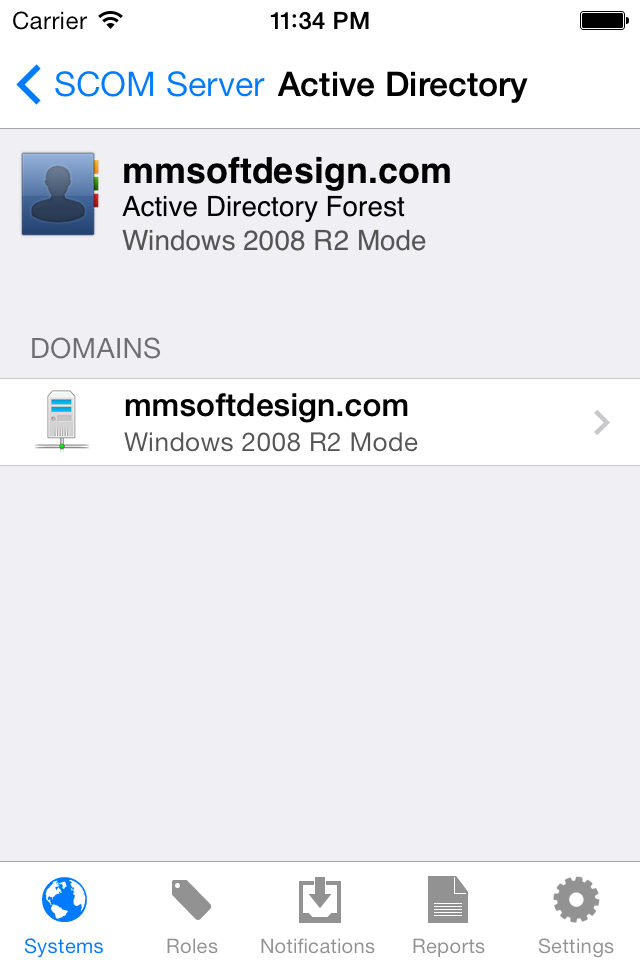 |
Unified Management Connect Pulseway to a domain controller and get access to the entire Active Directory Forest. New domains get automatically picked up by Pulseway so you can easily expand your directory without having to reconfigure anything. |
|
Fast Navigation Search for domain users and groups has never been this easy. Avoid the need of navigating through the Organization Unit hierarchy. |
 |
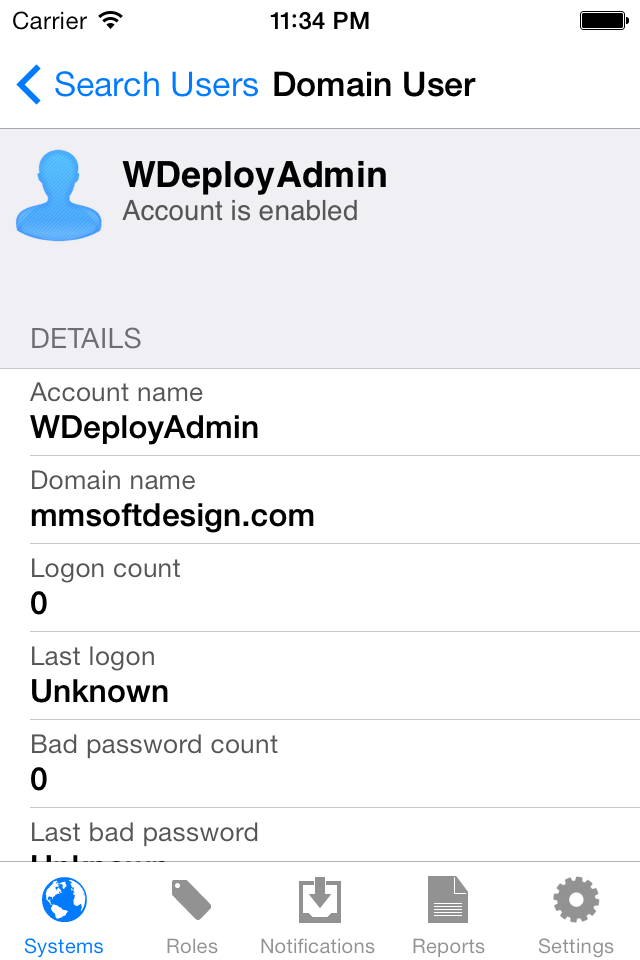 |
User Monitoring Get real-time user details and status to help you investigate account security. You can also track for users that get locked out by enabling account notifications. |
|
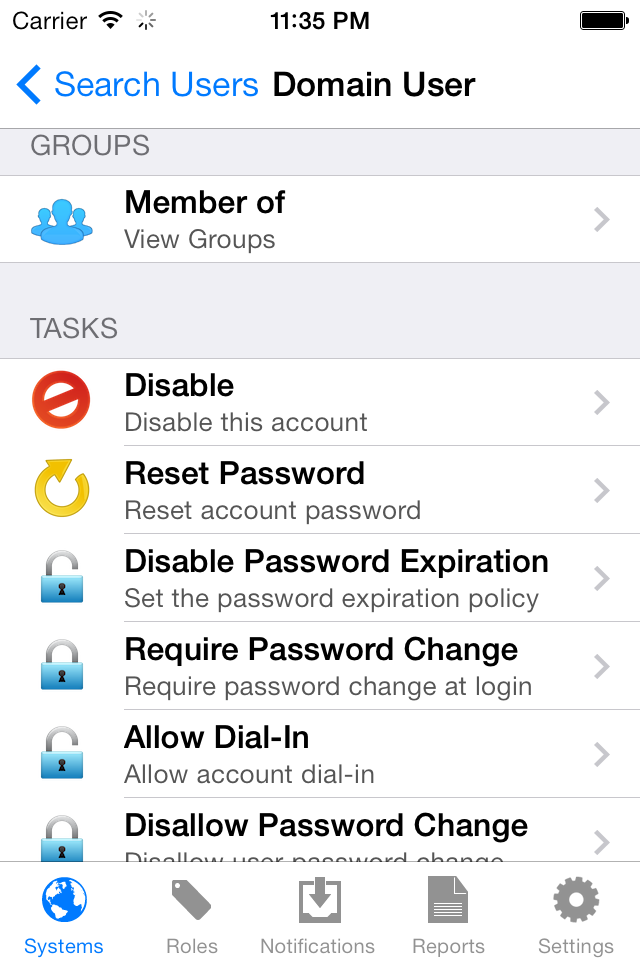
User Administration Change the status of users to get the user back online without the need of logging into the Active Directory Console. Enable, Disable and Reset Password are a few of the available user commands. |
 |
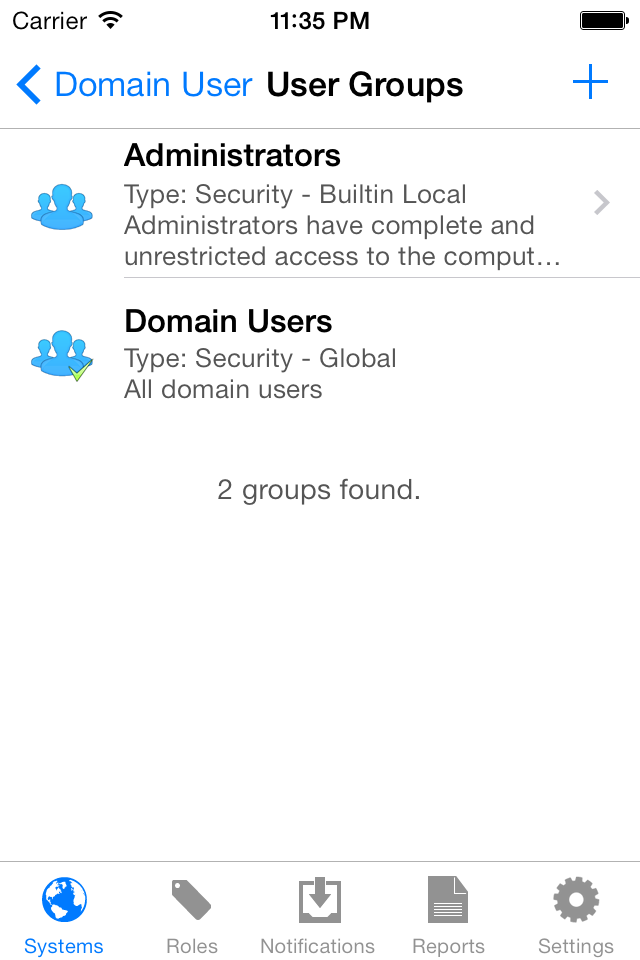 |
User Group Management Manage user's group membership to add or remove security features. You can either add or remove a user to a group from the User or Group details page. |
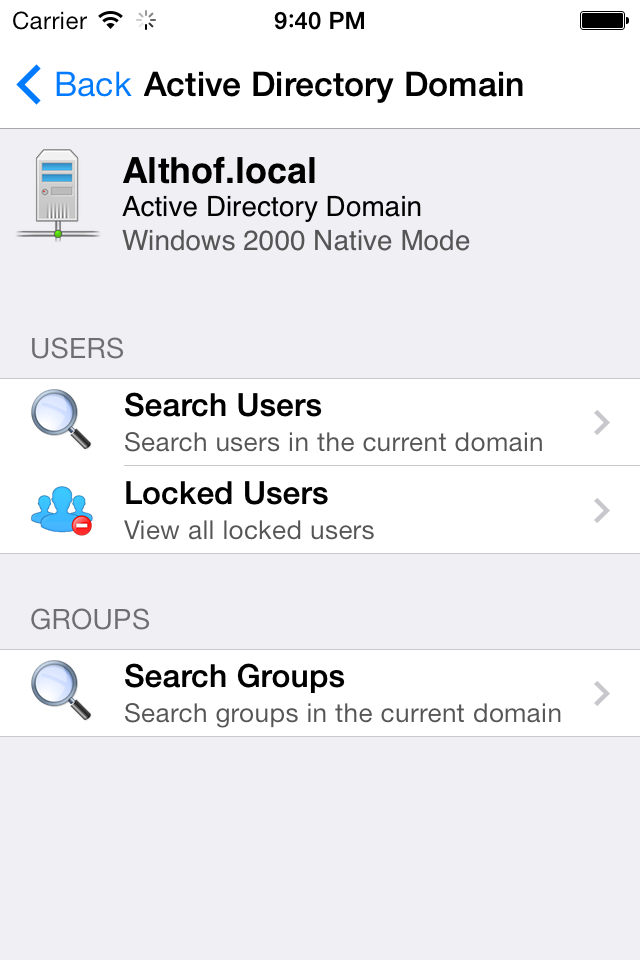
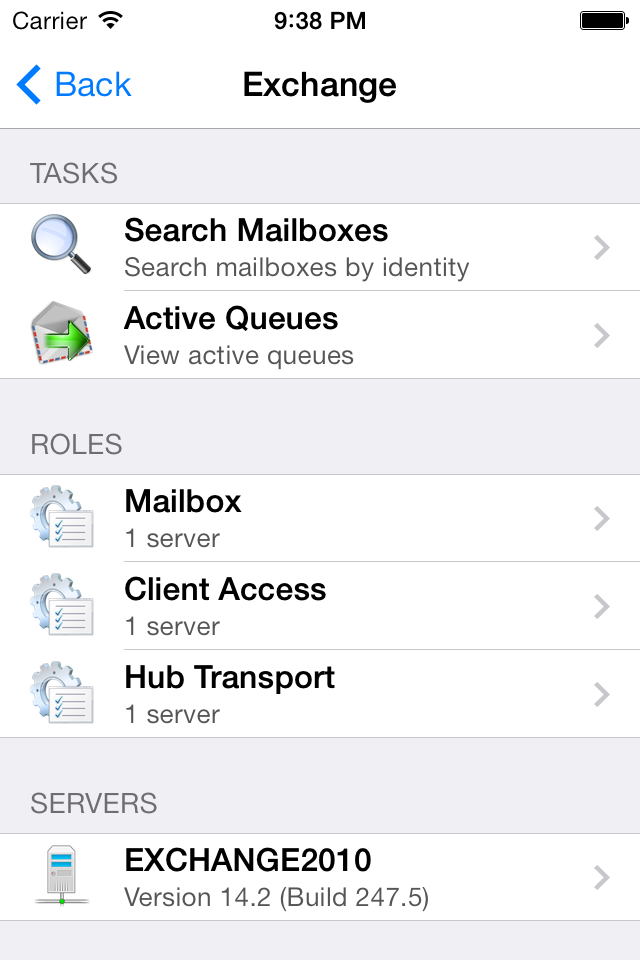
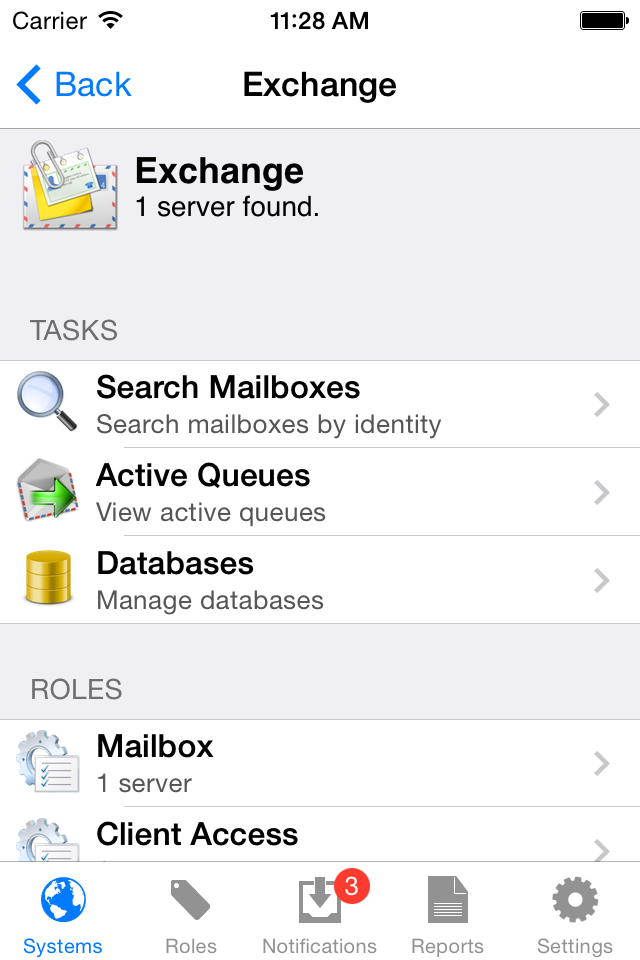
Pulseway simplifies monitoring and control of the Microsoft Exchange platform. Requiring no infrastructure changes, Exchange server module allows management without installing any software on the Exchange Server using top Microsoft secure RM technologies.
![]()
 |
Unified Management Connect Pulseway to one server and gain access to all servers in the Database Availability Group (DAG). Get started in less than 5 minutes: remote connection requires a server name, username and password where local connection work without any configuration. |
|
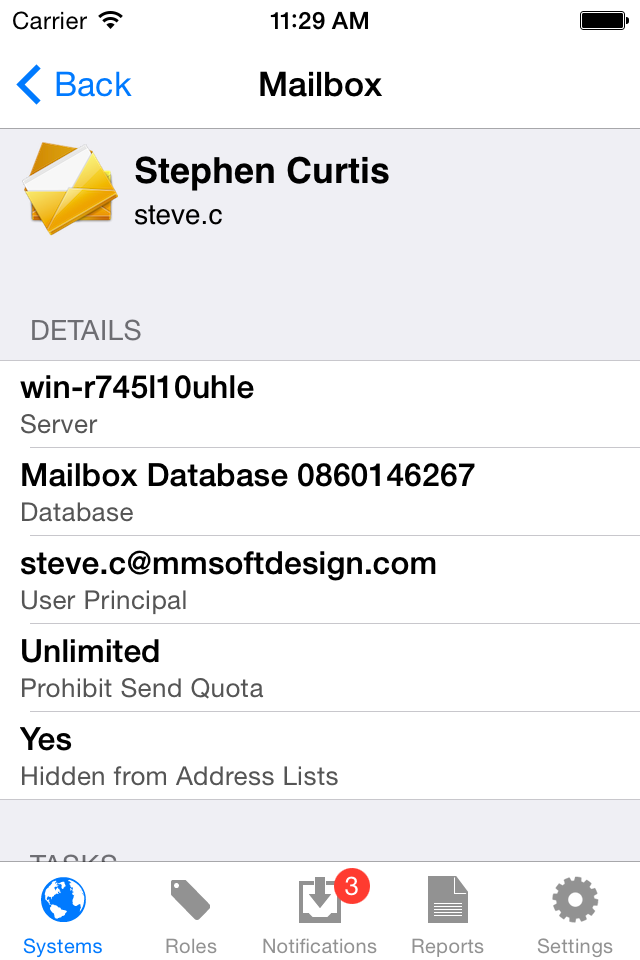
Enterprise Ready Search mailboxes through the entire directory; our user interface frees you from the clutter of information, showing you only information you need to get the task done. |
 |
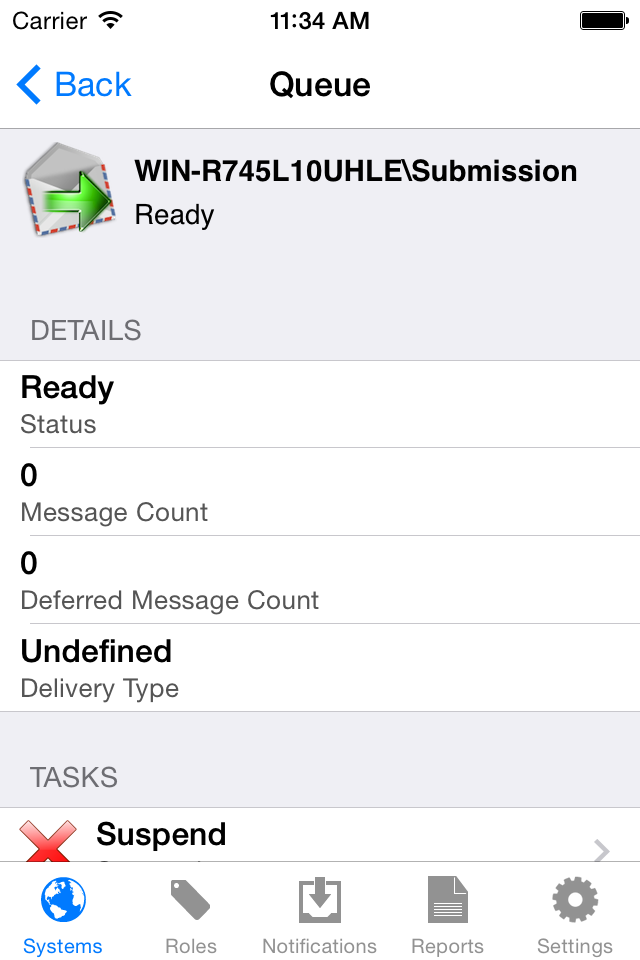 |
Queue Monitoring Spot growing mail queues that can be a product of transport failures, internet connection problems, and virus activity. |
|
Database Monitoring Be first to know when your databases fail over in your DAG! Receive notifications when databases get mounted or dismounted, control replication queues and set limits. |
 |
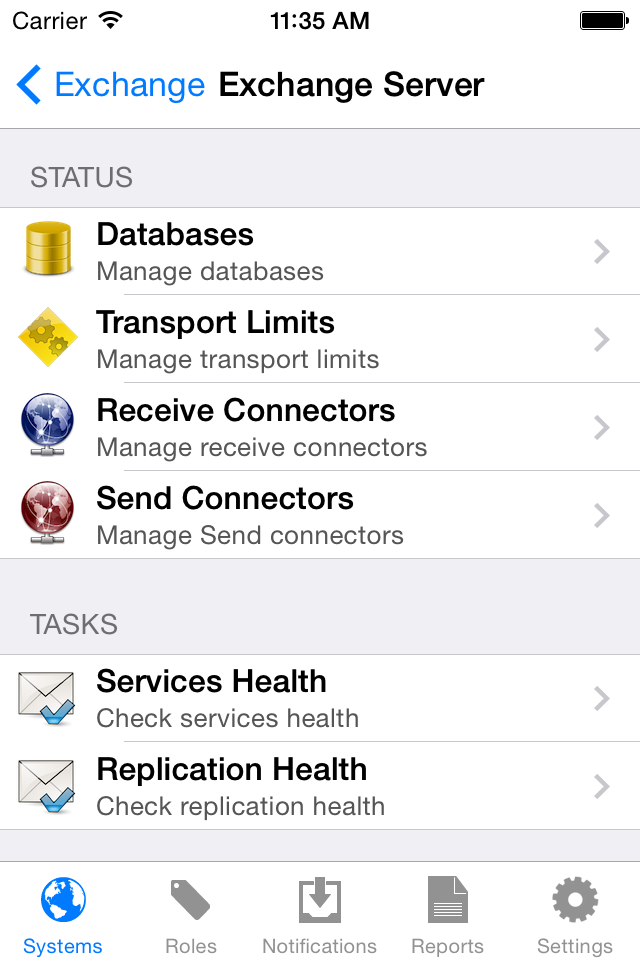 |
Server Configuration Manage Transport Settings, Receive and Send Connectors on the go. Tune your restrictions, limits and retries to find the correct formula that just works for your environment. |
|
One-Tap Health Test Keep a vigilant eye on Microsoft Exchange services and replication health. Monitor critical server health indicators to ensure service availablity. |
 |
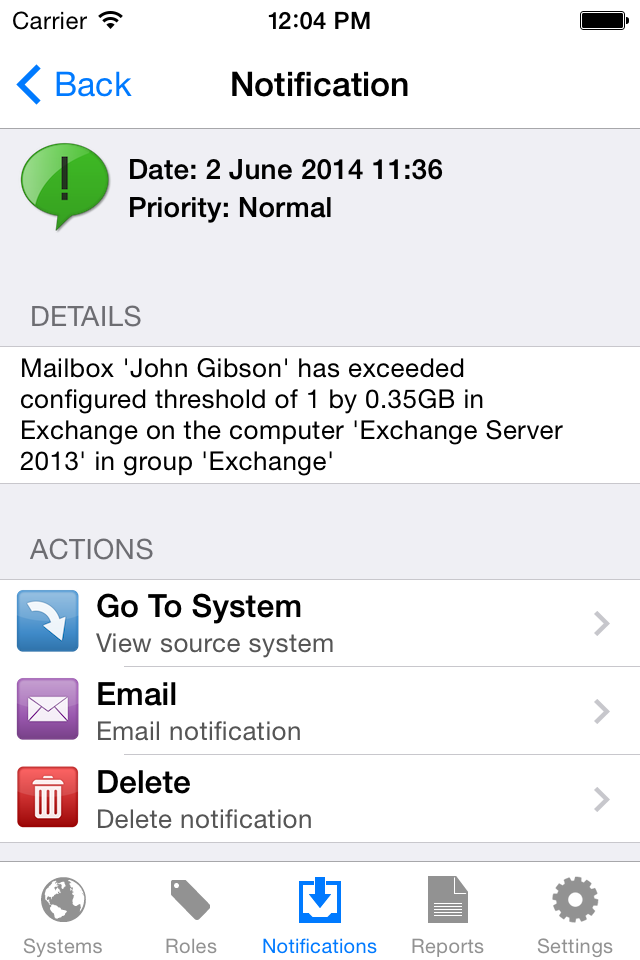 |
Monitor Mailboxes Create monitors that alert you whenever a mailbox grows unexpectedly. Gain an ease of mind knowing that mailboxes are under control and that you can prevent issues before they impact users. |
| Getting Started In just a few steps |
Example How to use .NET Cloud API |
Support Additional help resources |
You have an application you want to monitor? All you need to do is add a reference to the Pulseway Cloud API dll file: PulsewayCloud.dll and add two lines of code in your application, it’s that easy!
Service.Instance.Configure("Application Name", "Group", "Running on " + Environment.MachineName, false); Service.Instance.Start("username", "password", "apikey");
| Getting Started In just a few steps |
Example How to use .NET Cloud API |
Support Additional help resources |

Let’s consider you own an online book store and you would like to know in real time the current inventory, active orders and canceled orders. Here is the current code of the book store instance (this is an example, does not reflect a real book store). We have two base types: Book and Order and the main class BookShop:
| Book.cs |
public class Book { public Book(string Name, decimal Price) { this.Name = Name; this.Price = Price; } public string Name; public decimal Price; } |
| Order.cs |
public class Order { public Order(string Client, Book Book) { this.Client = Client; this.Book = Book; LastID++; ID = LastID; PurchaseDate = DateTime.Now.AddMonths(StaticRandom.Next(12)).AddDays(StaticRandom.Next(30)); Quantity = StaticRandom.Next(50); TransactionIdentifier = Guid.NewGuid().ToString(); } public int ID; public string Client; public Book Book; public bool Canceled; public DateTime PurchaseDate; public int Quantity; public string TransactionIdentifier; public static int LastID = 0; } |
| BookShop.cs |
public class BookShop { private readonly List<Order> OrderList = new List<Order>(); private List<Book> BookList = new List<Book>(); private List<string> ClientList = new List<string>(); public BookShop() { BookList = DataBank.GenerateBooks(); ClientList = DataBank.GenerateClientNames(); new Thread(AddOrders).Start(); Console.ReadLine(); } private void AddOrders() { while (OrderList.Count != 50) { OrderList.Add(new Order(ClientList[OrderList.Count], BookList[OrderList.Count])); Thread.Sleep(10000); } } private int GetCanceledOrdersCount() { return OrderList.Count(n => n.Canceled == true); } } |
DataBank is used to generate random client and book names. The source can be found on the download link at the end of the page.
As soon as our bookstore is getting created every 10 seconds a new order will get generated using a random book and client. All we need to do now is implement Cloud API into our code.
First we need to add a reference to PulsewayCloud.dll which can be downloaded from here.See Figure A
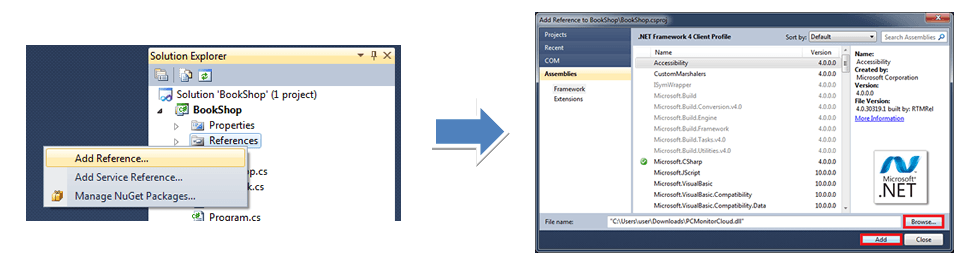 Figure A
Now we need to add: using MM.Monitor.Cloud; Right under the last using statement. Now we can start implementing the Cloud API.
Just like a plugin, Cloud API requires unique identifications (ID) for each PageItem and CommandItem so let's start by adding them as constants right below the ClientList The two PickListItems represent a container with Client and Book names that will be used with the PickListInput.
private readonly PickListItems ClientPickList = new PickListItems(); private readonly PickListItems BookPickList = new PickListItems(); private const int PAGE_LIST_ORDERS = 91; private const int PAGE_LIST_CANCELED_ORDERS = 92; private const int PAGE_LIST_BOOKS = 93; private const int COMMAND_CANCEL_ORDER = 1; private const int COMMAND_CLEAR_DATA = 2; private const int COMMAND_RESET_ORDER = 3
The reason why our page ids start from 91 is because other page id’s from 1 to 50 will represent the current order id for easier access. A noticeable difference between Cloud API and a plugin is that Cloud API uses events rather than invoking methods; however this doesn’t make it more difficult to work with. We need to subscribe to API’s events and the best place to do it is in the class constructor.
Service.Instance.OnDetailsRequest += OnDetailsRequest; Service.Instance.OnPageRequest += OnPageRequest; Service.Instance.OnCommandReceived += OnCommandReceived; Service.Instance.OnPageCommandReceived += OnPageCommandReceived; Service.Instance.OnExceptionOccured += OnExceptionOccured; Service.Instance.OnDateTimeInputValueChanged += OnDateTimeInputChanged; Service.Instance.OnNumericInputValueChanged += OnNumericInputValueChanged; Service.Instance.OnTextInputValueChanged += OnTextInputValueChanged; Service.Instance.OnPickListInputValueChanged += OnPickListInputValueChange;
Now we need to instruct the service that we are "online" and provide the authentication details. You can add this too into the constructor.
Service.Instance.Configure("Book Shop", "Cloud", "Running on " + Environment.MachineName, false); Service.Instance.Start("username", "password", "apikey");
Replace username, password and apikey with your details. You can have the API key for your account (for free) on demand at: [email protected].
This is how your constructor should look like:
public BookShop() { BookList = DataBank.GenerateBooks(); ClientList = DataBank.GenerateClientNames(); RegeneratePickLists(); Service.Instance.OnDetailsRequest += OnDetailsRequest; Service.Instance.OnPageRequest += OnPageRequest; Service.Instance.OnCommandReceived += OnCommandReceived; Service.Instance.OnPageCommandReceived += OnPageCommandReceived; Service.Instance.OnExceptionOccured += OnExceptionOccured; Service.Instance.OnDateTimeInputValueChanged += OnDateTimeInputChanged; Service.Instance.OnNumericInputValueChanged += OnNumericInputValueChanged; Service.Instance.OnTextInputValueChanged += OnTextInputValueChanged; Service.Instance.OnPickListInputValueChanged += OnPickListInputValueChange; Service.Instance.Configure("Book Shop", "Cloud", "Running on " + Environment.MachineName, false); Service.Instance.Start("username", "password", "apikey"); new Thread(AddOrders).Start(); Console.ReadLine(); }
Notice the new RegeneratePickLists method added right above the event subscriptions. This method is used to pre-create PickListItems that will be used when an Order Detail page is loaded. Here is the code:
private void RegeneratePickLists() { BookPickList.Clear(); ClientPickList.Clear(); for (int i = 0; i < BookList.Count; i++) BookPickList.Add(new PickListItem(i + 1, BookList[i].Name, BookList[i].Price.ToString())); for (int i = 0; i < ClientList.Count; i++) ClientPickList.Add(new PickListItem(i + 1, ClientList[i])); }
All we need to do now is implement the subscribers.
void OnDetailsRequest()
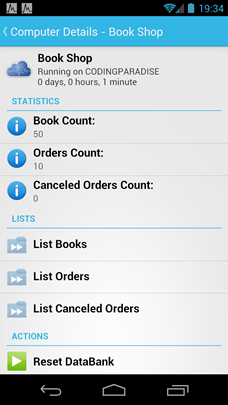
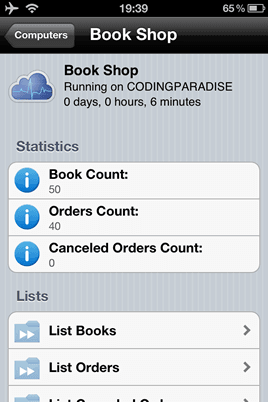
This event gets triggered when a client requests the "Groups" container that contains your dataSee Figure B. This is a perfect place for a main menu where you can add "PageItems" that lead to Lists of items, detailed pages or commands, "CommandItems" that usually affect important parts of your application and "SimpleItems" that display important parameters of your application. In our example we will display the total amount of books in our inventory, total orders and how many canceled orders. Then we 3 pages which represent lists of books, current orders and canceled orders. Finally we want to add a button that will delete all books, and orders and regenerate all the data.
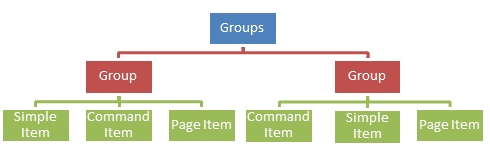 Figure B
private void OnDetailsRequest() { Groups container = new Groups(); Group stats = new Group("Statistics"); stats.Items.Add(new SimpleItem("Book Count: ", BookList.Count.ToString())); stats.Items.Add(new SimpleItem("Orders Count: ", OrderList.Count.ToString())); stats.Items.Add(new SimpleItem("Canceled Orders Count: ", GetCanceledOrdersCount().ToString())); Group pages = new Group("Lists"); pages.Items.Add(new PageItem(PAGE_LIST_BOOKS, "List Books")); pages.Items.Add(new PageItem(PAGE_LIST_ORDERS, "List Orders")); pages.Items.Add(new PageItem(PAGE_LIST_CANCELED_ORDERS, "List Canceled Orders")); Group actions = new Group("Actions"); actions.Items.Add(new CommandItem(COMMAND_CLEAR_DATA, "Reset DataBank")); container.Add(stats); container.Add(pages); container.Add(actions); Service.Instance.SetDetails(container); }
The last line is how you return the "Groups" container to the mobile client. With Client API you only returned it to the method, here you need to call SetDetails method.
void OnPageRequest(int pageId, string mobileDeviceIdentifier)
OnPageRequest is called when a client asks for the contents of a Page. Unlike the ClientAPI here you get the mobileDeviceIdentifier so that you can add another layer of security where you can create access levels based on device identifiers. On our example we just list our books, orders, canceled orders if it matches their page IDs and if not we display the order details page and we take our OrderID from thePageID. See Figure C
 Figure C
private void OnPageRequest(int pageId, string mobileDeviceIdentifier) { Groups container = new Groups(); Group contents = null; switch (pageId) { case PAGE_LIST_BOOKS: Console.WriteLine("Page List Books hit"); contents = new Group("Book List"); foreach (Book b in BookList) contents.Items.Add(new SimpleItem(b.Name, b.Price.ToString())); break; case PAGE_LIST_ORDERS: Console.WriteLine("Page List Orders hit"); contents = new Group("Order List"); foreach (Order o in OrderList) contents.Items.Add(new PageItem(o.ID, String.Format("Client: {0}\nBook: {1}\nPrice: {2}\nCanceled: {3}",o.Client, o.Book.Name, o.Book.Price, o.Canceled))); break; case PAGE_LIST_CANCELED_ORDERS: Console.WriteLine("Page List Canceled Orders hit"); contents = new Group("Canceled Order List"); foreach (Order co in OrderList.Where(q => q.Canceled == true)) contents.Items.Add(new PageItem(co.ID, String.Format("Client: {0}\nBook: {1}\nPrice: {2}\nCanceled: {3}",co.Client, co.Book.Name, co.Book.Price, co.Canceled))); break; default: Console.WriteLine("Page Order Details hit"); contents = new Group("Order Details"); Order current = OrderList.Single(q => q.ID == pageId); contents.Items.Add(new PickListInputItem("client." + pageId, "Client: " + current.Client, ClientPickList)); contents.Items.Add(new PickListInputItem("book." + pageId, "Book: " + current.Book.Name, BookPickList)); contents.Items.Add(new SimpleItem("Book Price: ", current.Book.Price.ToString(), SimpleItemStyle.INFORMATION)); contents.Items.Add(new DateTimeInputItem(pageId.ToString(), "Order Date: ", current.PurchaseDate.ToString("dd/MM/yyyy H:mm:ss"))); contents.Items.Add(new NumberInputItem(pageId.ToString(), "Quantity: ", current.Quantity.ToString())); contents.Items.Add(new TextInputItem(pageId.ToString(), "Transaction: ", current.TransactionIdentifier)); if (!current.Canceled) { contents.Items.Add(new SimpleItem("Canceled: ", current.Canceled.ToString(), SimpleItemStyle.INFORMATION)); contents.Items.Add(new CommandItem(COMMAND_CANCEL_ORDER, "Cancel Order")); } else { contents.Items.Add(new SimpleItem("Canceled: ", current.Canceled.ToString(), SimpleItemStyle.WARNING)); contents.Items.Add(new CommandItem(COMMAND_RESET_ORDER, "Reset Order")); } break; } container.Add(contents); Service.Instance.SetPageDetails(pageId, container); }
SetPageDetails is required to send "Groups" container back to the client. Don’t forget to add it! As you can see we check if pageId belongs to one of our list pages and if not we will assume it’s an Order.
void OnCommandReceived(int commandId, string mobileDeviceIdentifier)
Just like a plugin Cloud API has two Command handlers, one of a Page Command for a root level Command (Commands that originated from "OnDetailsRequest"). In our case we only got one root level command, Clear Data.
private void OnCommandReceived(int commandId, string mobileDeviceIdentifier) { if (commandId == COMMAND_CLEAR_DATA) { BookList = DataBank.GenerateBooks(); ClientList = DataBank.GenerateClientNames(); OrderList.Clear(); Order.LastID = 0; } }
void OnPageCommandReceived(int pageId, int commandId, string mobileDeviceIdentifier)
Now we need to implement our Cancel Order and Reset Order as Page Commands because they get created inside the Order Details page. These commands just change the Canceled field in our Order.
private void OnPageCommandReceived(int pageId, int commandId, string mobileDeviceIdentifier) { if (commandId == COMMAND_CANCEL_ORDER) OrderList.Single(q => q.ID == pageId).Canceled = true; else if (commandId == COMMAND_RESET_ORDER) OrderList.Single(q => q.ID == pageId).Canceled = false; }
void OnExceptionOccured(Exception ex)
If anything unusual happens with Cloud API will report to our instance so that logging and apropiate actions can occur. In our case we host our application inside a Console Application and we only print it to the screen.
private void OnExceptionOccured(Exception ex) { Console.WriteLine(ex.Message); }
void OnDateTimeInputChanged(string inputId, MM.Monitor.Cloud.DateTime inputValue)
OnDateTimeInputChanged occurs when you submit a new value on a DateTimeInput. You will receive the inputId you specified and the new value. In Book Shop example this will represent the Purchase Date of an Order.
private void OnDateTimeInputChanged(string inputId, MM.Monitor.Cloud.DateTime inputValue) { Console.WriteLine(String.Format("DateTimeInput Changed: ID: {0} Value: {1}", inputId, inputValue)); OrderList.Single(q => q.ID == Int32.Parse(inputId)).PurchaseDate = new System.DateTime(inputValue.Year, inputValue.Month, inputValue.Day, inputValue.Hour, inputValue.Minute, 0); }
void OnTextInputValueChanged(string inputId, string inputValue)
OnTextInputValueChanged will receieve the new value of your text input. In Book Shop example this will represent the Transaction ID of an Order.
private void OnTextInputValueChanged(string inputId, string inputValue) { Console.WriteLine(String.Format("TextInput Changed: ID: {0} Value: {1}", inputId, inputValue)); OrderList.Single(q => q.ID == Int32.Parse(inputId)).TransactionIdentifier = inputValue; }
void OnNumericInputValueChanged(string inputId, int inputValue)
OnNumericInputValueChanged will only accept numbers, very useful because it actually shows a digit only keyboard on the mobile device. In Book Shop example this will represent the Quantity of and Order.
private void OnExceptionOccured(Exception ex) { Console.WriteLine(String.Format("NumericInput Changed: ID: {0} Value: {1}", inputId, inputValue)); OrderList.Single(q => q.ID == Int32.Parse(inputId)).Quantity = inputValue; }
void OnPickListInputValueChange(string inputId, int pickListItemId)
PickListInputs are very simillar to an enumeration. The items have an Identifier, a Title and a Subtitle. In Book Shop example we use PickListInputs for Book and Client changes in an Order. We added "book." and "client." prefixes to inputID in order to split the inputs between book and client changes.
private void OnPickListInputValueChange(string inputId, int pickListItemId) { Console.WriteLine(String.Format("PickListInputValue Changed: ID: {0} Item ID: {1}", inputId, pickListItemId - 1)); string[] values = inputId.Split('.'); if (values[0] == "book") OrderList.Single(q => q.ID == Int32.Parse(values[1])).Book = BookList[pickListItemId - 1]; else if (values[0] == "client") OrderList.Single(q => q.ID == Int32.Parse(values[1])).Client = ClientList[pickListItemId - 1]; }
void OnDateInputChanged(string inputId, MM.Monitor.Cloud.Date inputValue)
Unlike DateTimeInputChanged this input type will only return a date value without the time. This method is not used in the BookShop example.
private void OnDateInputChanged(string inputId, MM.Monitor.Cloud.Date inputValue) { Console.WriteLine(String.Format("DateInput Changed: ID: {0} Value: {1}", inputId, inputValue)); }
void OnTimeInputChanged(string inputId, MM.Monitor.Cloud.Time inputValue)
Similar to OnDateInputChanged this input type will only return a time value without the date. This method is not used in the BookShop example.
private void OnTimeInputChanged(string inputId, MM.Monitor.Cloud.Time inputValue) { Console.WriteLine(String.Format("TimeInput Changed: ID: {0} Value: {1}", inputId, inputValue)); }
| Getting Started In just a few steps |
Example How to use .NET Cloud API |
Support Additional help resources |
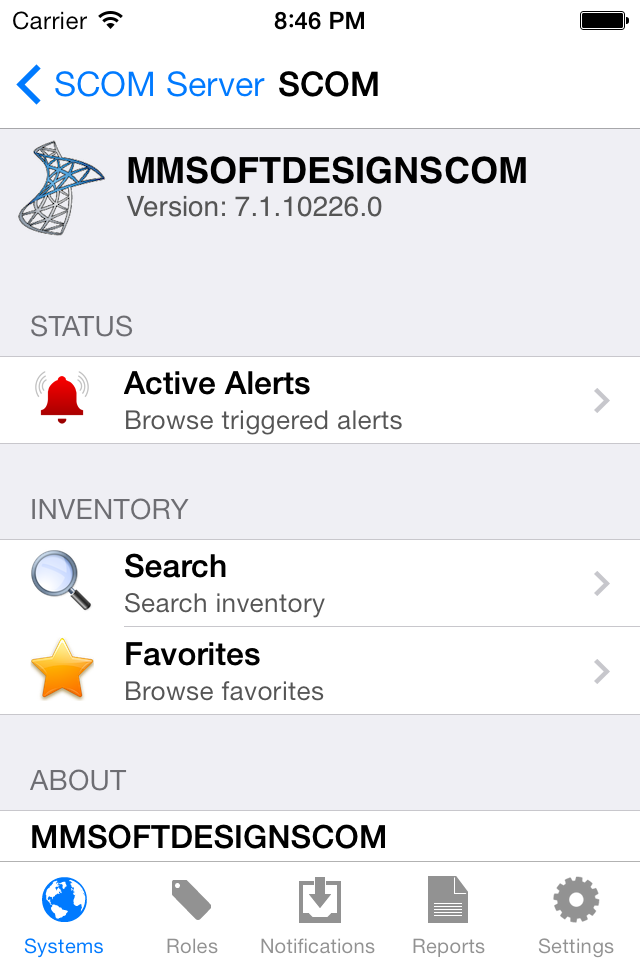
System Center Operations Manager Manage Microsoft System Center Operations Manager from your smartphone or tablet, anywhere, anytime. System Center Operations Manager server module offers a mobile dashboard for SCOM. This server module can easily be integrated with any infrastructure without the need of complicated configurations or changes to the existing deployment.
![]()
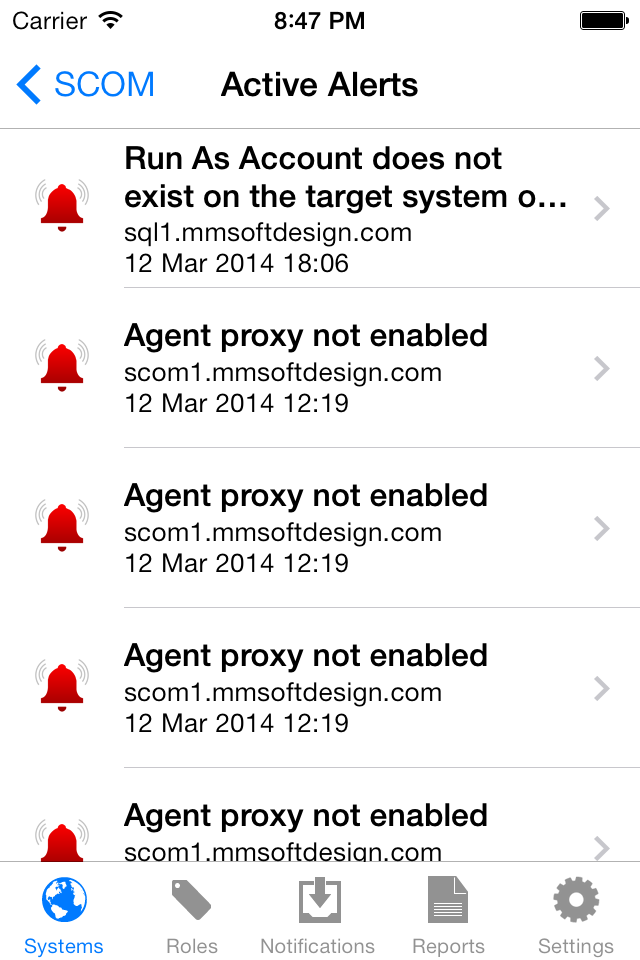 |
Be First to Know Pulseway can monitor the active alerts and notify you if any alert triggered or reached a warning state. Alerts can be closed or forwarded by email to a colleague for further investigation. |
|
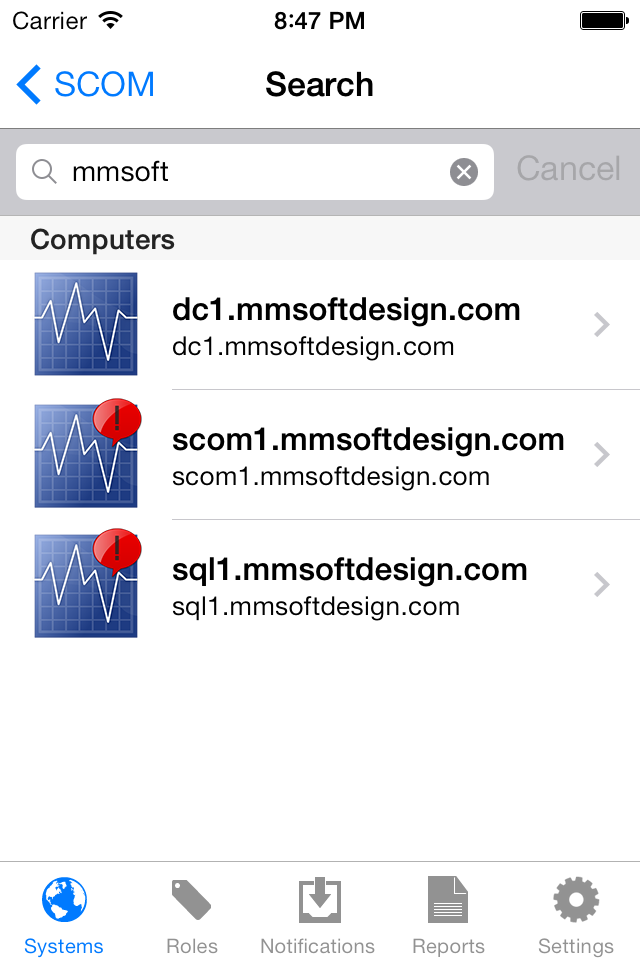
Easy Navigation Quickly find the monitored system by searching the entire SCOM inventory. Favoriting critical systems provides easy access to real-time metrics without the need to always use the search function. |
 |
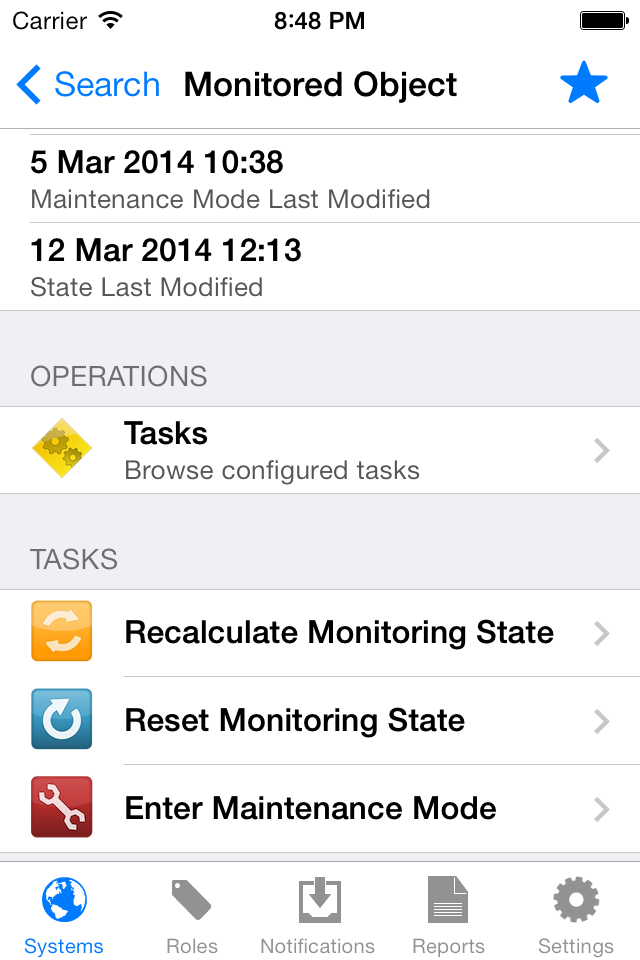 |
Maintenance Tasks On a customer site and need to perform maintenance tasks without triggering SCOM alerts? Grab your mobile device and remotely create your maintenance window. |
|
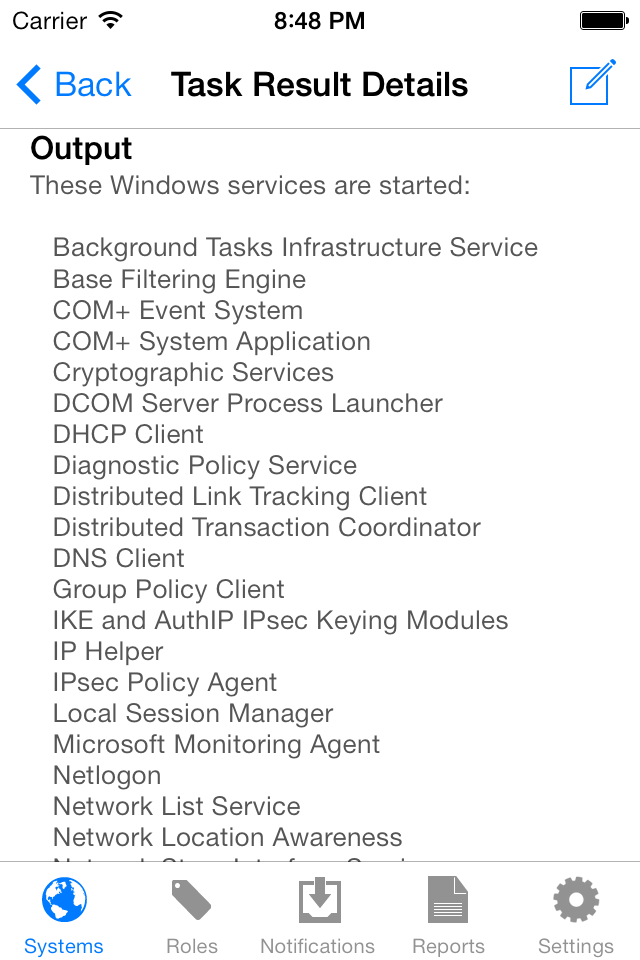
Take Control Run system tasks, get real-time progress updates and view output with just one tap. Task outputs can be sent via email to easily share with your team members. |
 |
Take control of your virtual infrastructure using your smartphone or tablet, anywhere, anytime. Hyper-V server module mobilizes Microsoft Hyper-V management tools allowing the IT department to quickly take action without the need of a computer.
![]()
 |
Monitor Replication Health Pulseway monitors the replication health of all replicating virtual machines and notifies if anything goes out of normal parameters. View real-time replication status with color-coded health indicators. |
|
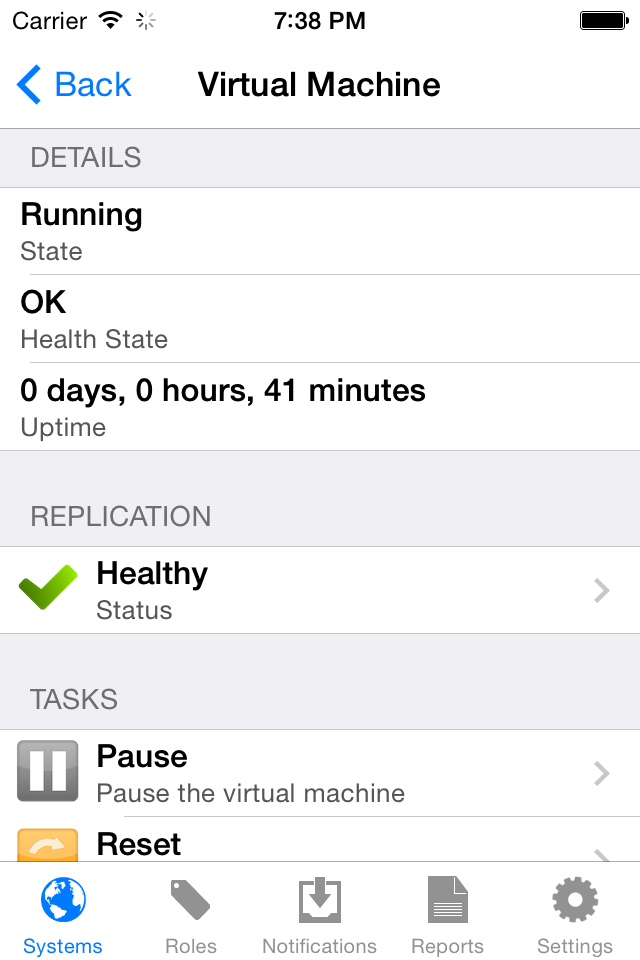
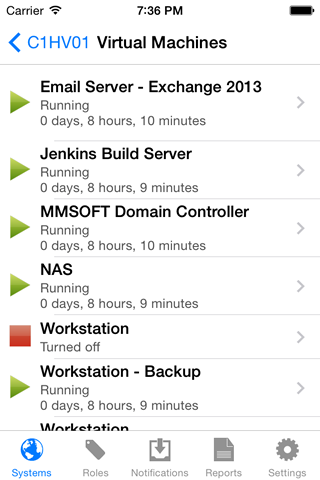
Easy To Use Hyper-V management has never been easier; Open the app and get an eagle’s eye view on your virtualized environment. One tap on a virtual machine shows real-time metrics such as Health state State and Uptime. |
 |
 |
Take Control Are you in front of your desk and you notice that your virtual workstation is not responding? Send Pause, Reset, Turn Off and Shut Down commands to virtual machines and watch them execute. |
|
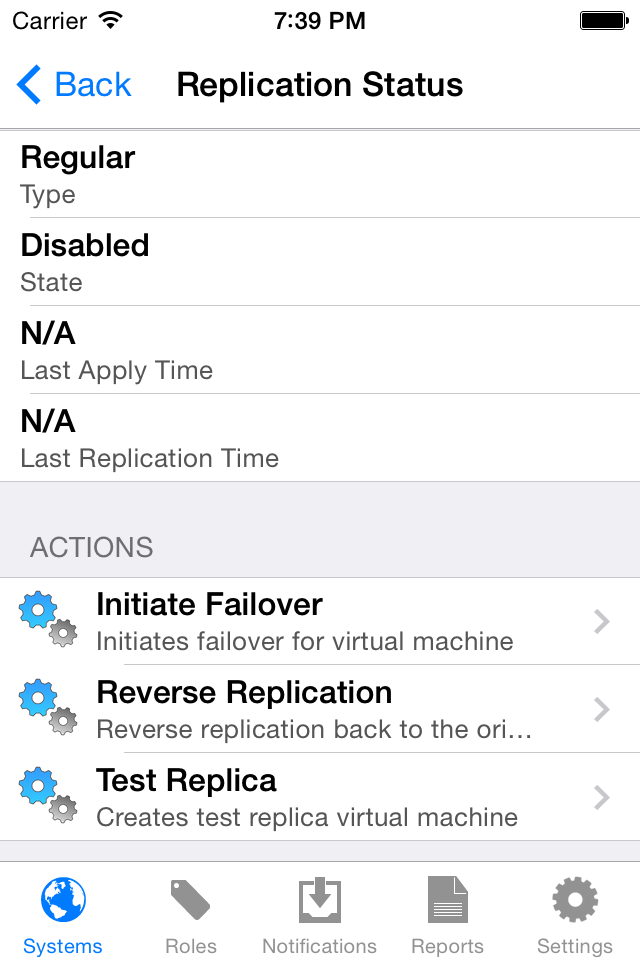
Manage Replication You receive a notification from Pulseway that a virtual machine has failed over to another node, you fix the problem with the faulty node but you need to commit the failover and reverse the replication back to the original node. Pulseway can send replication commands like Initiate Failover, Create Test Replica System, Reverse Replication Direction and Commit/Reverse Replication. |
 |
 |
Live View Watch virtual machine’s screen in real-time and stop Bluescreens, inactivity and potential corporate policy breaches all from your smartphone or tablet. Now you can see when backup operations finish and you can remotely shut down the virtual machines without the need of your laptop. |
| Getting Started In just a few steps |
Example How to use .NET Cloud API |
Support Additional help resources |
You have an application you want to monitor? All you need to do is add a reference to the Pulseway Cloud API jar file: pulseway-cloud.jar and add two lines of code in your application, it’s that easy!
| Getting Started In just a few steps |
Example How to use .NET Cloud API |
Support Additional help resources |

Let’s consider you own an online book store and you would like to know in real time the current inventory, active orders and canceled orders. Here is the current code of the book store instance (this is an example, does not reflect a real book store). We have two base types: Book and Order and the main class BookShop:
Book.java
public class Book { private String name; private Double price; public Book(String name, Double price) { super(); this.setName(name); this.setPrice(price); } public void setName(String name) { this.name = name; } public String getName() { return name; } public void setPrice(Double price) { this.price = price; } public Double getPrice() { return price; } }
Order.java
public class Order { private final int id; private final String client; private final Book book; private boolean canceled; private static int lastID = 0; private int Quantity; private String TransactionIdentifier; private Date PurchaseDate; public Order(String client, Book book) { super(); this.client = client; this.book = book; id = ++lastID; Random generator = new Random(); Quantity = generator.nextInt(50); TransactionIdentifier = java.util.UUID.randomUUID().toString(); PurchaseDate = new Date(); } public int getId() { return id; } public String getClient() { return client; } public Book getBook() { return book; } public Date getPurchaseDate() { return PurchaseDate; } public int getQuantity() { return Quantity; } public String getTransactionIdentifier() { return TransactionIdentifier; } public void setCanceled(boolean canceled) { this.canceled = canceled; } public void setQuantity(int Quantity) { this.Quantity = Quantity; } public void setTransactionIdentifier(String TransactionIdentifier) { this.TransactionIdentifier = TransactionIdentifier; } public void setPurchaseDate(Date date) { this.PurchaseDate = date; } public void setBook(Book book) { this.book = book; } public void setClient(String client) { this.client = client; } public boolean isCanceled() { return canceled; } public static void initializeIds() { lastID = 0; } }
BookShop.java
public class BookShop { private final ArrayList orderList = new ArrayList (); private ArrayList bookList = new ArrayList (); private ArrayList clientList = new ArrayList (); public BookShop() { bookList = DataBank.generateBooks(); clientList = DataBank.generateClientNames(); regeneratePickLists(); new Thread() { public void run() { addOrders(); }; }.start(); } private void addOrders() { while (orderList.size() != 50) { orderList.add(new Order(clientList.get(orderList.size()), bookList.get(orderList.size()))); try { Thread.sleep(10000); } catch (InterruptedException e) { trace(e); } } } private int getCanceledOrdersCount() { int result = 0; for (Order co : orderList) { if (co.isCanceled()) { result++; } } return result; } }
DataBank is used to generate random client and book names. The source can be found on the download link at the end of the page.
As soon as our bookstore is getting created every 10 seconds a new order will get generated using a random book and client. All we need to do now is implement Cloud API into our code.
First we need to add a reference to PulsewayCloud.dll which can be downloaded from here.
Now we can start implementing the Cloud API. Just like a plugin, Cloud API requires unique identifications (ID) for each PageItem and CommandItem so let’s start by adding them as constants right below the ClientList.
private final static int PAGE_LIST_ORDERS = 91; private final static int PAGE_LIST_CANCELED_ORDERS = 92; private final static int PAGE_LIST_BOOKS = 93; private final static int COMMAND_CANCEL_ORDER = 1; private final static int COMMAND_CLEAR_DATA = 2; private final static int COMMAND_RESET_ORDER = 3;
The reason why our page ids start from 91 is because other page id’s from 1 to 50 will represent the current order id for easier access. A noticeable difference between Cloud API and a plugin is that Cloud API uses events rather than invoking methods; however this doesn’t make it more difficult to work with. We need to subscribe to API’s events and the best place to do it is in the class constructor.
Service.getInstance().setDetailsRequestHandler(new MyDetailsRequestHandler()); Service.getInstance().setPageRequestHandler(new MyPageRequestHandler()); Service.getInstance().setCommandReceivedHandler(new MyCommandReceivedHandler()); Service.getInstance().setPageCommandReceivedHandler(new MyPageCommandReceivedHandler()); Service.getInstance().setExceptionOccurredHandler(new MyExceptionOccurredHandler()); Service.getInstance().setInputValueChangedHandler(new InputEvents());
Now we need to instruct the service that we are "online" and provide the authentication details. You can add this too into the constructor.
String computername = "Unknown"; try { computername = InetAddress.getLocalHost().getHostName(); } catch (UnknownHostException e) { trace(e); } Service.getInstance().configure("Book Shop", "Cloud", "Running on " + computername, false); Service.getInstance().start(""username", "password", "apikey");
Replace username, password and apikey with your details. You can have the API key for your account (for free) on demand at: [email protected].
This is how your constructor should look like:
public BookShop() { bookList = DataBank.generateBooks(); clientList = DataBank.generateClientNames(); regeneratePickLists(); String computername = "Unknown"; try { computername = InetAddress.getLocalHost().getHostName(); } catch (UnknownHostException e) { System.out.println(e); } Service.getInstance().configure("Book Shop", "Cloud", "Running on " + computername, false); String username = "Pulseway Username"; String password = "Pulseway Password"; String apiKey = "Pulseway API Key / API Token"; Service.getInstance().setDetailsRequestHandler(new MyDetailsRequestHandler()); Service.getInstance().setPageRequestHandler(new MyPageRequestHandler()); Service.getInstance().setCommandReceivedHandler(new MyCommandReceivedHandler()); Service.getInstance().setPageCommandReceivedHandler(new MyPageCommandReceivedHandler()); Service.getInstance().setExceptionOccurredHandler(new MyExceptionOccurredHandler()); Service.getInstance().setInputValueChangedHandler(new InputEvents()); Service.getInstance().start(username, password, apikey); new Thread() { public void run() { addOrders(); }; }.start();
All we need to do now is implement the subscribers.
interface DetailsRequestHandler
The onDetailsRequest() handler's method gets called when a client requests the "Groups" container that contains your data See Figure A. This is a perfect place for a main menu where you can add "PageItems" that lead to Lists of items, detailed pages or commands, "CommandItems" that usually affect important parts of your application and "SimpleItems" that display important parameters of your application. In our example we will display the total amount of books in our inventory, total orders and how many canceled orders. Then we 3 pages which represent lists of books, current orders and canceled orders. Finally we want to add a button that will delete all books, and orders and regenerate all the data.
Figure A
class MyDetailsRequestHandler implements DetailsRequestHandler { @Override public void onDetailsRequest() { Groups container = new Groups(); Group stats = new Group("Statistics"); stats.getItems().add( new SimpleItem("Book Count: ", Integer.toString(bookList .size()))); stats.getItems().add( new SimpleItem("Orders Count: ", Integer.toString(orderList .size()))); stats.getItems().add( new SimpleItem("Canceled Orders Count: ", Integer .toString(getCanceledOrdersCount()))); Group pages = new Group("Lists"); pages.getItems().add(new PageItem(PAGE_LIST_BOOKS, "List Books")); pages.getItems().add(new PageItem(PAGE_LIST_ORDERS, "List Orders")); pages.getItems().add( new PageItem(PAGE_LIST_CANCELED_ORDERS, "List Canceled Orders")); Group actions = new Group("Actions"); actions.getItems().add( new CommandItem(COMMAND_CLEAR_DATA, "Reset DataBank")); container.add(stats); container.add(pages); container.add(actions); Service.getInstance().setDetails(container); } }
The last line is how you return the "Groups" container to the mobile client. With Client API you only returned it to the method, here you need to call setDetails method.
interface PageRequestHandler
onPageRequest(int pageId, String mobileDeviceIdentifier) is called when a client asks for the contents of a Page. Unlike the ClientAPI here you get the mobileDeviceIdentifier so that you can add another layer of security where you can create access levels based on device identifiers. On our example we just list our books, orders, canceled orders if it matches their page IDs and if not we display the order details page and we take our orderID from thePageID. See Figure B.
Figure B
class MyPageRequestHandler implements PageRequestHandler { @Override public void onPageRequest(int pageId, String mobileDeviceIdentifier) { Groups container = new Groups(); Group contents = null; switch (pageId) { case PAGE_LIST_BOOKS: contents = new Group("Book List"); for (Book b : bookList) { contents.getItems().add(new SimpleItem(b.getName(), priceFormatter.format(b .getPrice()))); } break; case PAGE_LIST_ORDERS: contents = new Group("Order List"); for (Order o : orderList) { contents.getItems().add( new PageItem(o.getId(), orderToString(o))); } break; case PAGE_LIST_CANCELED_ORDERS: contents = new Group("Canceled Order List"); for (Order co : orderList) { if (co.isCanceled()) { contents.getItems().add( new PageItem(co.getId(), orderToString(co))); } } break; default: contents = new Group("Order Details"); Order current = getOrderWithId(pageId); contents.getItems().add(new PickListInputItem("client." + Integer.toString(pageId), "Client Name: ", current.getClient(), clientPickList)); contents.getItems().add(new PickListInputItem("book." + Integer.toString(pageId), "Book Name: ", current.getBook().getName(), bookPickList)); contents.getItems().add(new SimpleItem("Book Price: ", priceFormatter.format(current.getBook().getPrice()), SimpleItemStyle.INFORMATION)); contents.getItems().add(new DateTimeInputItem(Integer.toString(pageId), "Order Date: ", current.getPurchaseDate().toString())); contents.getItems().add(new NumberInputItem(Integer.toString(pageId), "Quantity: ", Integer.toString(current.getQuantity()))); contents.getItems().add(new TextInputItem(Integer.toString(pageId), "Transaction: ", current.getTransactionIdentifier())); contents.getItems().add(new SimpleItem("Canceled: ", current.isCanceled() ? "Yes" : "No", current.isCanceled() ? SimpleItemStyle.WARNING : SimpleItemStyle.INFORMATION)); if (!current.isCanceled()) contents.getItems().add( new CommandItem(COMMAND_CANCEL_ORDER, "Cancel Order")); else contents.getItems() .add(new CommandItem(COMMAND_RESET_ORDER, "Reset Order")); break; } container.add(contents); Service.getInstance().setPageDetails(pageId, container); } }
setPageDetails is required to send "Groups" container back to the client. Don’t forget to add it! As you can see we check if pageId belongs to one of our list pages and if not we will assume it’s an Order.
interface CommandReceivedHandler
Just like a plugin Cloud API has two Command handlers, one of a Page Command for a root level Command (Commands that originated from Groups from "setDetails"). In our case we only got one root level command, Clear Data.
class MyCommandReceivedHandler implements CommandReceivedHandler { @Override public void onCommandReceived( int commandId, String mobileDeviceIdentifier) { if (commandId == COMMAND_CLEAR_DATA) { bookList = DataBank.generateBooks(); clientList = DataBank.generateClientNames(); orderList.clear(); regeneratePickLists(); Order.initializeIds(); } } }
interface PageCommandReceivedHandler
Now we need to implement our Cancel Order and Reset Order as Page Commands because they get created inside the Order Details page. These commands just change the Canceled field in our Order.
class MyPageCommandReceivedHandler implements PageCommandReceivedHandler { @Override public void onPageCommandReceived( int pageId, int commandId, String mobileDeviceIdentifier) { if (commandId == COMMAND_CANCEL_ORDER) { getOrderWithId(pageId).setCanceled(true); } else if (commandId == COMMAND_RESET_ORDER) { getOrderWithId(pageId).setCanceled(false); } } }
interface ExceptionOccurredHandler
If anything unusual happens with Cloud API will report to our instance so that logging and apropiate actions can occur. In our case we only print it to the console.
class MyExceptionOccurredHandler implements ExceptionOccurredHandler { @Override public void onExceptionOccurred(Exception ex) { System.out.println(ex.toString()); } }
void onDateTimeInputValueChanged(String id, com.mmsoftdesign.cloud.model.DateTime value)
onDateTimeInputChanged occurs when you submit a new value on a DateTimeInput. You will receive the inputId you specified and the new value. In Book Shop example this will represent the Purchase Date of an Order.
@Override public void onDateTimeInputValueChanged(String id, DateTime value) { getOrderWithId(Integer.parseInt(id)).setPurchaseDate(new Date(value.getYear() - 1900, value.getMonth(), value.getDay(), value.getHour(), value.getMinutes(), 0)); }
void onTextInputValueChanged(String id, String value)
onTextInputValueChanged will receieve the new value of your text input. In Book Shop example this will represent the Transaction ID of an Order.
@Override public void onTextInputValueChanged(String id, String value) { getOrderWithId(Integer.parseInt(value)).setTransactionIdentifier(value); }
onNumericInputValueChanged(String id, int value)
onNumericInputValueChanged will only accept numbers, very useful because it actually shows a digit only keyboard on the mobile device. In Book Shop example this will represent the Quantity of and Order.
@Override public void onNumericInputValueChanged(String id, int value) { getOrderWithId(Integer.parseInt(id)).setQuantity(value); }
onPickListInputValueChanged(String id, int pickedItemId)
PickListInputs are very simillar to an enumeration. The items have an Identifier, a Title and a Subtitle. In Book Shop example we use PickListInputs for Book and Client changes in an Order. We added "book." and "client." prefixes to inputID in order to split the inputs between book and client changes.
@Override public void onPickListInputValueChanged(String id, int pickedItemId) { String[] s = id.split("\\."); if (s[0].equals("book")) getOrderWithId(Integer.parseInt(s[1])).setBook(bookList.get(pickedItemId - 1)); else if (s[0].equals("client")) getOrderWithId(Integer.parseInt(s[1])).setClient(clientList.get(pickedItemId - 1)); }
onDateInputValueChanged(String id, com.mmsoftdesign.cloud.model.Date value)
Unlike DateTimeInputChanged this input type will only return a date value without the time. This method is not used in the BookShop example.
@Override public void void onDateInputValueChanged(String id, Date value) { System.out.println("Got date: " + Integer.toString(value.getYear()) + " " + Integer.toString(value.getMonth()) + " " + Integer.toString(value.getDay())); }
onTimeInputValueChanged(String id, Time value)
Similar to OnDateInputChanged this input type will only return a time value without the date. This method is not used in the BookShop example.
@Override public void onTimeInputValueChanged(String id, Time value) { System.out.println("Got time: " + Integer.toString(value.getHour()) + " " + Integer.toString(value.getMinutes())); }
| Getting Started In just a few steps |
Example How to use .NET Cloud API |
Support Additional help resources |
Monitor VMware vSphere infrastructure from your smartphone or tablet, anywhere, anytime. VMware vSphere server module gives you an insight at-a-glance over realtime status of hypervisors and virtual machines. Wether you are monitoring 10 hypervisors or a thousand VMware Server Module performs great on enterprise class deployments.
![]()
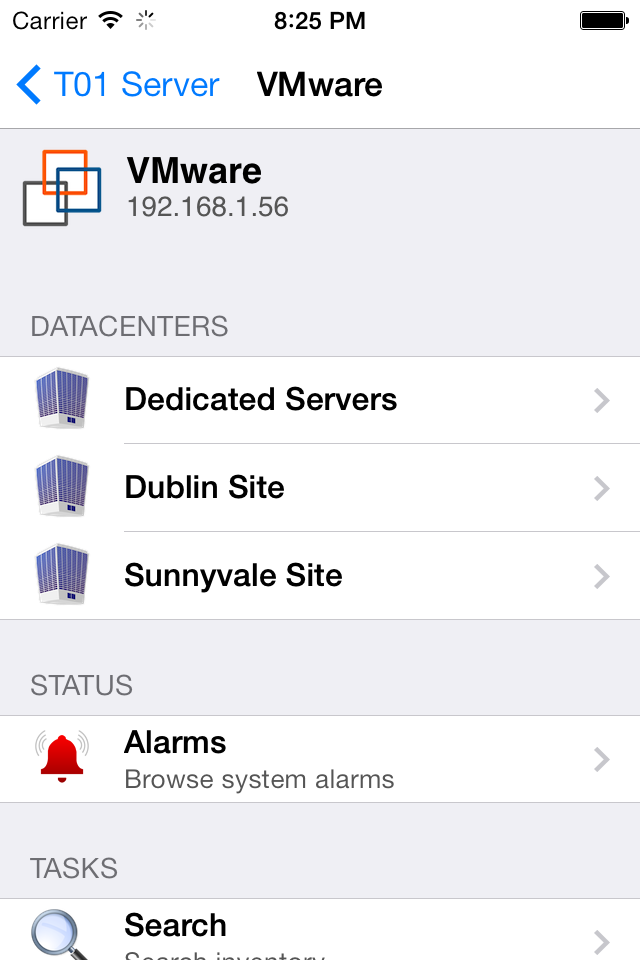 |
Manage vCenter and ESXi hypervisors Connect to the full vSphere solution or only standalone ESXi hypervisors. Get your virtual cloud monitored securely without firewall rules, expensive VPN connections or complicated proxies. Plug Pulseway and you are managing your vSphere solution in no time. |
|
Manage Snapshots Reverting to snapshot state or creating new snapshots has never been easier. Quickly backup system state from anywhere, anytime. |
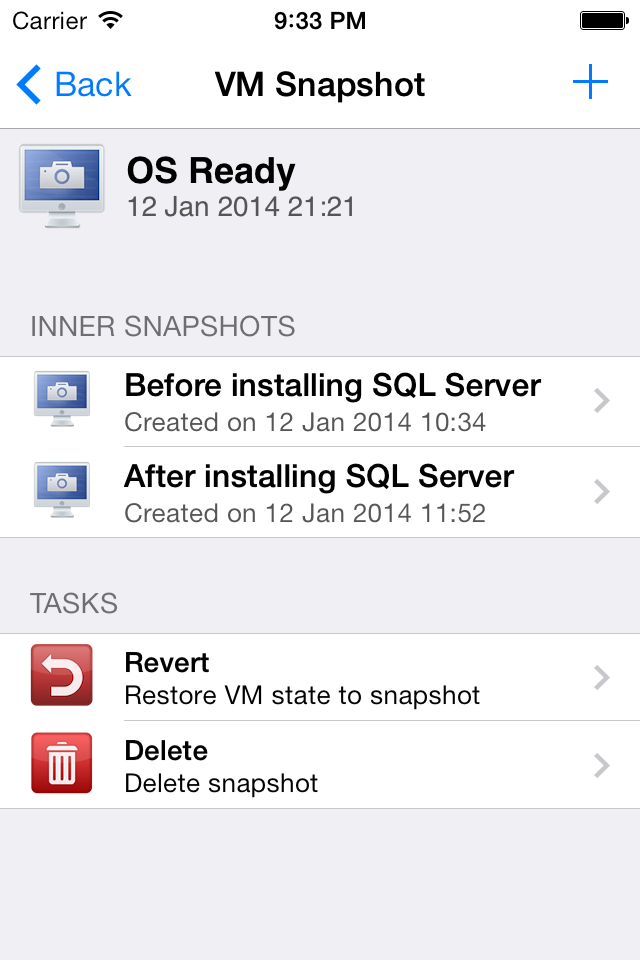 |
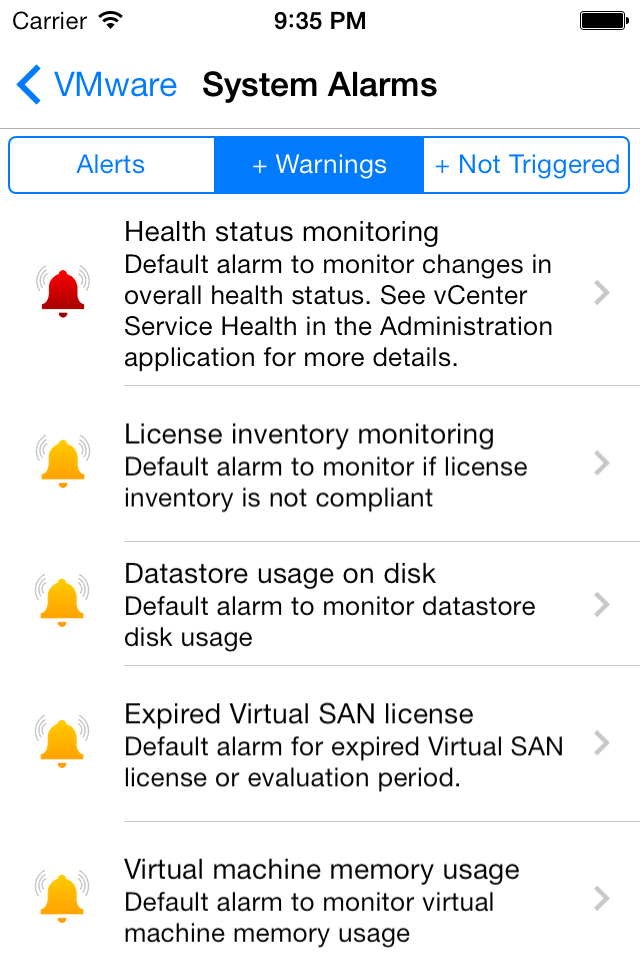 |
Receive vCenter Alarms Be first to know when a vCenter alarm gets triggered so you can quickly take action. Alarms are the first sign of performance degradation and a timely notification means faster resolution. |
|
Manage Virtual Machines Check realtime status and resource usages right to promply identify performance issues. Whenever required you can logoff, restart and shutdown the guest operating system or reboot and poweroff the virtual machine. |
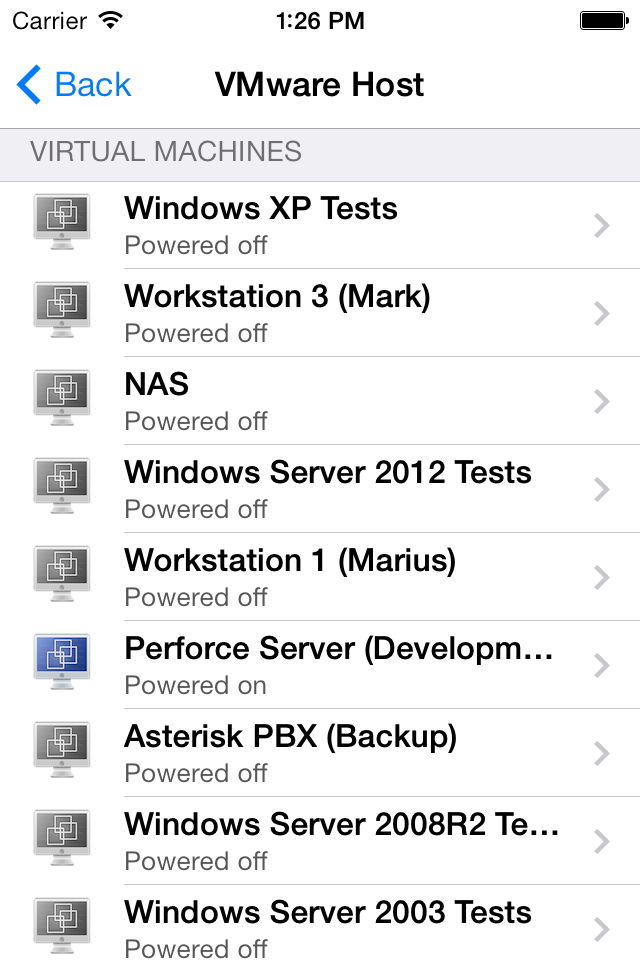 |
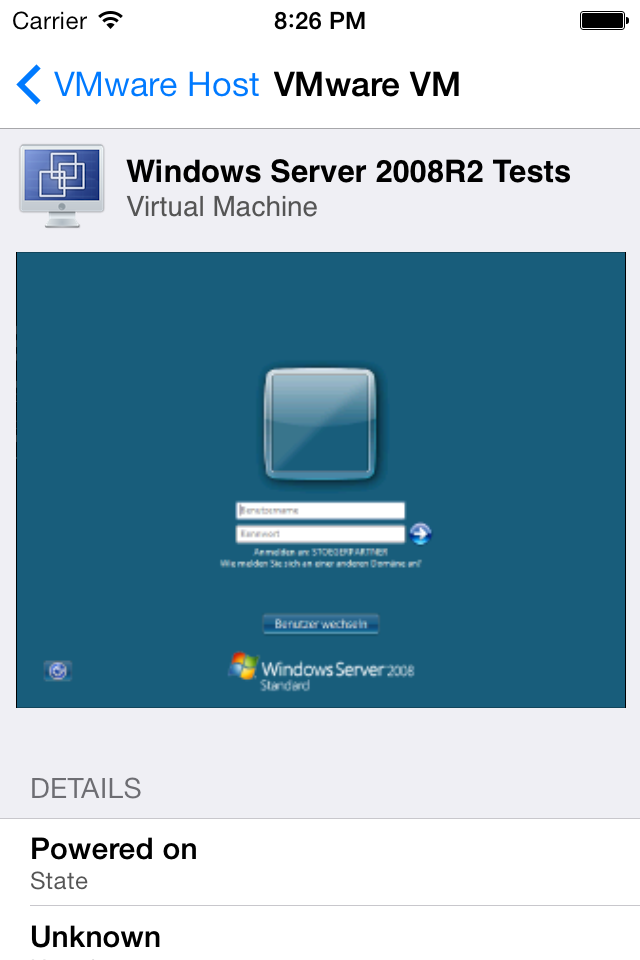 |
Live View Watch virtual machine live console feed to notice system errors, prompt dialogs and user activity. |
|
Control Hypervisors Take control of your ESXi hypervisors by performing maintenance tasks: Restart, Shutdown, Power On and Maintenance Mode Switches are possible. |
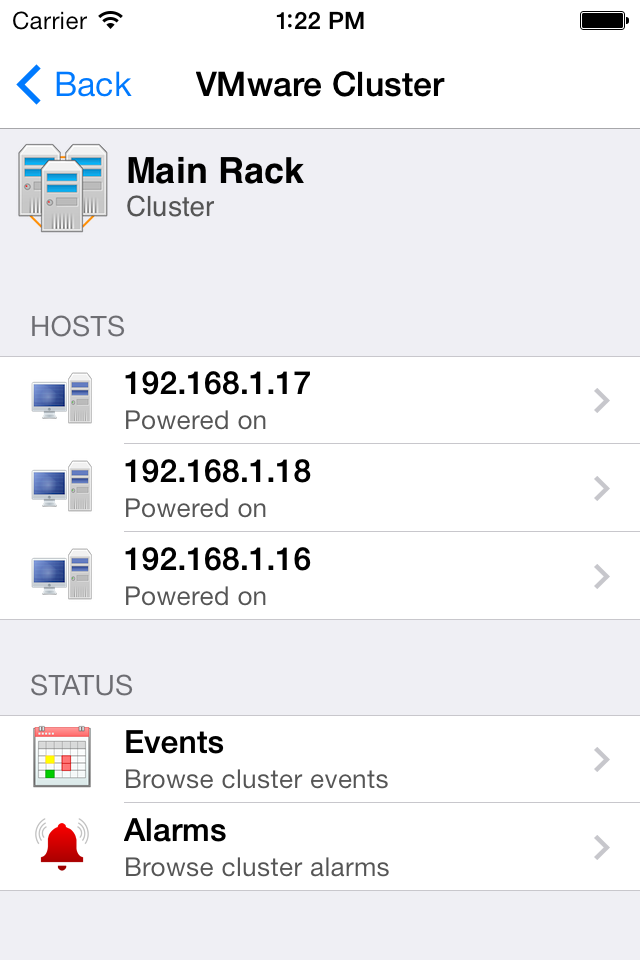 |
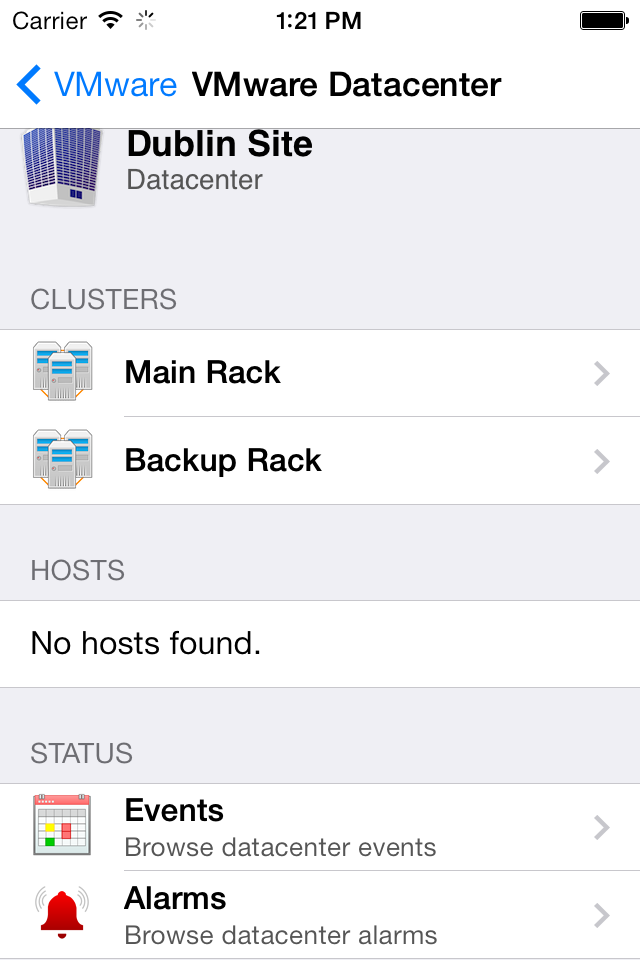 |
Granular Navigation Browse through datacenters, clusters, hypervisors and virtual machines or use the Search feature to quickly find the managed system you are looking for. |
|
Event Logs View system logs in realtime to see if maintenance tasks have finished and easily notice any system errors before they lead to a system failure. |
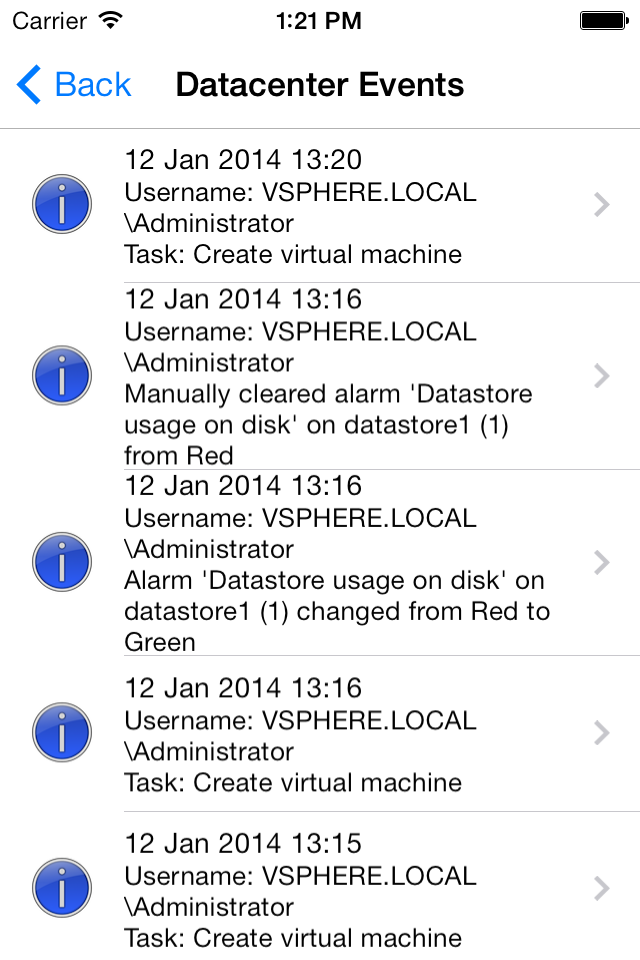 |
Get Started | Pulseway
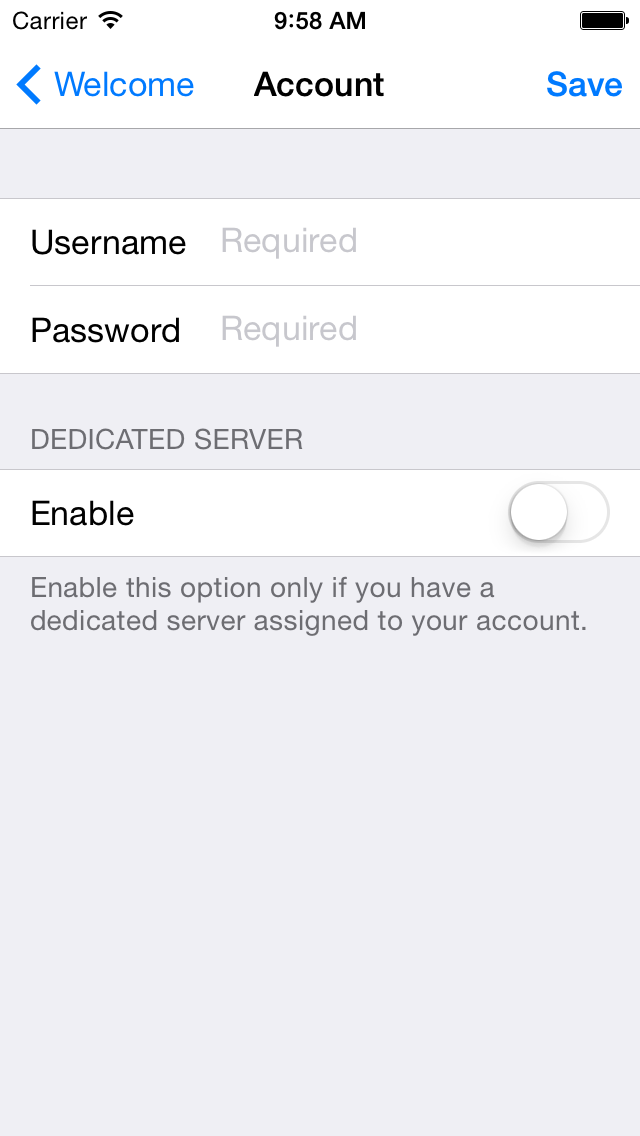

Windows
Download the appropriate version for your system: Pulseway for Windows x64 (64 bit) or Pulseway for Windows x86 (32 bit).
After you have downloaded the installer, follow the instructions in the setup screen and the Pulseway will ask you for your account credentials. Complete the account details and press the "Validate Account" button to validate them. Click on the "OK" button to save the configuration and select "Yes" when prompted to start the Pulseway service.

Debian
Open terminal (a ssh connection will work too) and run the Linux installer:
wget http://www.pulseway.com/download/pulseway_x64.deb
Alternatively, if your Operating System is working on a 32-bit architecture:
wget http://www.pulseway.com/download/pulseway_x86.deb
Start the installation process:
dpkg -i pulseway_x64.deb or dpkg -i pulseway_x86.deb
Once Pulseway is installed make a copy of the sample configuration file:
cp /etc/pulseway/config.xml.sample /etc/pulseway/config.xml
Using your favorite text editor (vim, nano, etc.) edit the config.xml and start customizing the configuration:
vim /etc/pulseway/config.xml
Note: Make sure to replace Username="username" and Password="password" with your actual username and password.
Start pulseway:
/etc/init.d/pulseway start

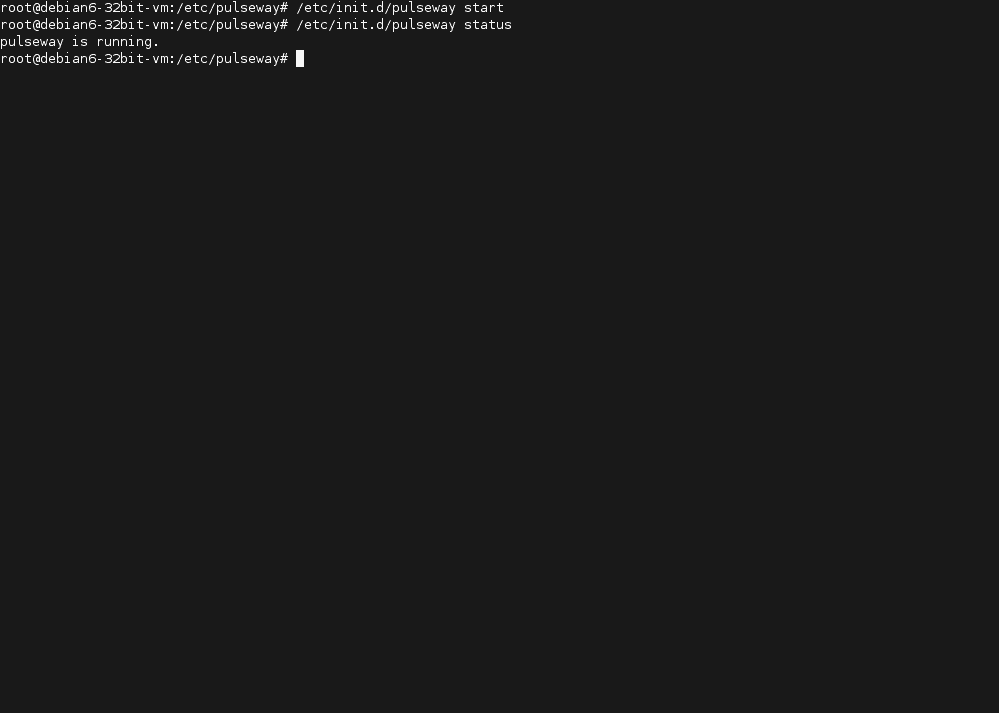
Red Hat Linux
Open terminal (a ssh connection will work too) and run the Linux installer:
rpm -ivh http://www.pulseway.com/download/pulseway_x64.rpm
Alternatively, if your Operating System is working on 32-bit architecture:
rpm -ivh http://www.pulseway.com/download/pulseway_x86.rpm
Once Pulseway is installed make a copy of the sample configuration file:
cp /etc/pulseway/config.xml.sample /etc/pulseway/config.xml
Using your favorite text editor (vim, nano, etc.) edit the config.xml and start customizing the configuration:
vim /etc/pulseway/config.xml
Note: Make sure to replace Username="username" and Password="password" with your actual username and password.
Start pulseway:
/etc/init.d/pulseway start

Raspblan
Open terminal (a ssh connection will work too) and run the Linux installer:
wget http://www.pulseway.com/download/pulseway_armhf.deb
Then start the installation process:
dpkg -i pulseway_armhf.deb
Once Pulseway is installed make a copy of the sample configuration file:
cp /etc/pulseway/config.xml.sample /etc/pulseway/config.xml
Using your favorite text editor (vim, nano, etc.) edit the config.xml and start customizing the configuration:
vim /etc/pulseway/config.xml
Note: Make sure to replace Username="username" and Password="password" with your actual username and password.
Start pulseway:
/etc/init.d/pulseway start
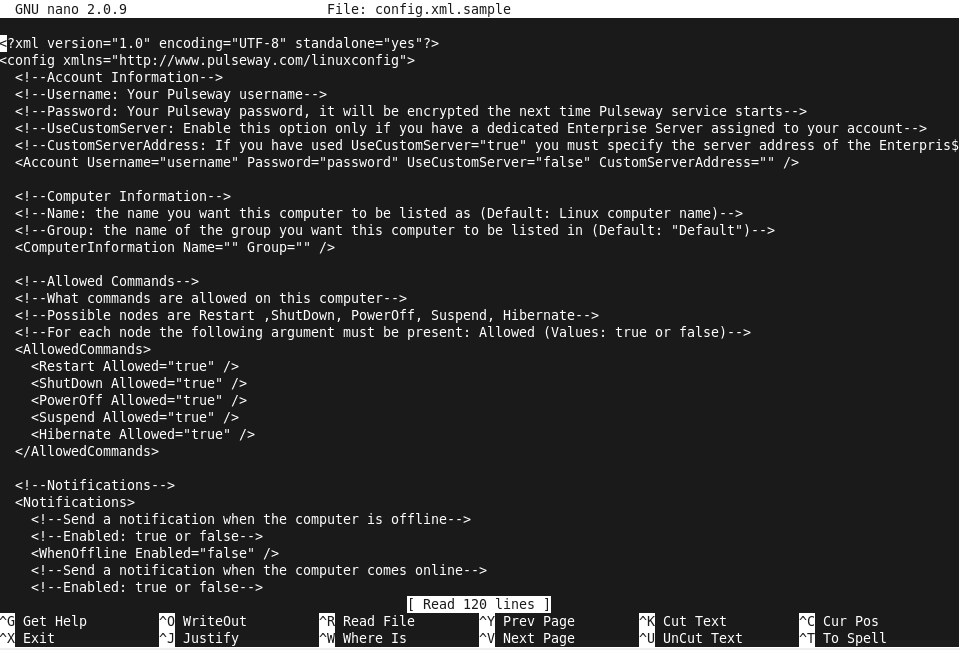

Mac OS X
To install Pulseway on a Mac operating system download and open the Pulseway for Mac.
Drag the Pulseway application from the left into the Applications folder (the icon on the right).
Start the Pulseway agent then click the lock icon to enable configuration changes, type in your account credentials and click on the"Validate Account" to validate your account details then press "Apply" to save the configuration.

|
|
PERSONAL |
PROFESSIONAL |
ENTERPRISE |
|
|
|||
|
System |
5 | Up to 200 | From 100 |
|
User Accounts |
1 | 1 | 10 |
|
Daily Notifications |
20 | Unlimited | Unlimited |
|
Mobile Devices |
2 | Unlimited | Unlimited |
|
ESET Remote Administrator |
|||
|
Remote Desktop (beta) |
|||
|
Dashboard |
|||
|
Web Access |
|||
|
Terminal / PowerShell |
|
||
|
Screen Viewer |
|
||
|
User Chat |
|||
|
User Support Requests |
|||
|
Windows Server Backup |
|||
|
Internet Information Services |
|||
|
SCOM |
|
||
|
Exchange |
|||
|
Active Directory |
|||
|
Hyper-V |
|||
|
VMware |
|||
|
XenServer |
|||
|
SQL Server |
|||
|
SNMP |
|||
|
Amazon |
|||
|
Azure |
|||
|
Reports |
|||
|
Multi-Account Management |
|||
|
Audit |
|||
|
Notifications Archive |
|
|